|
|
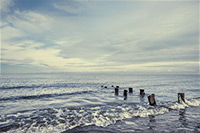
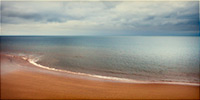
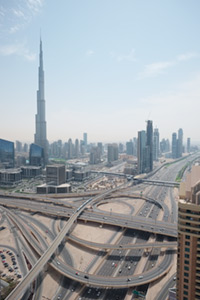
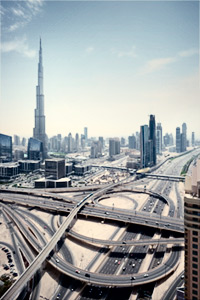
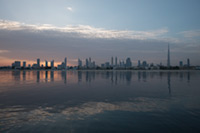
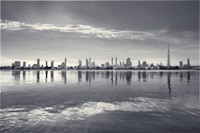
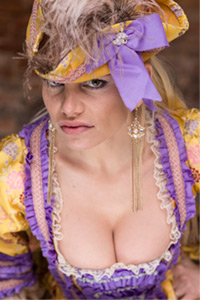
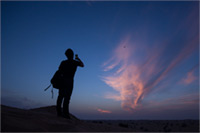
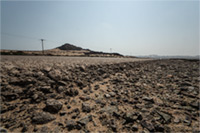
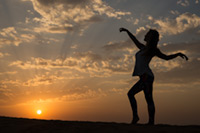
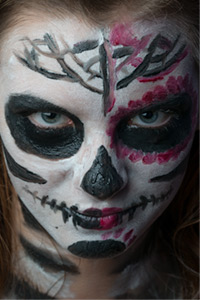
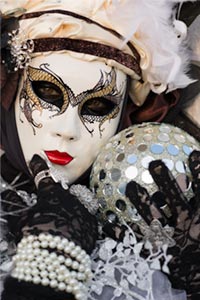
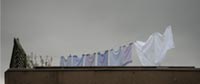
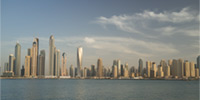
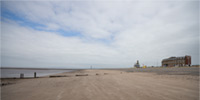
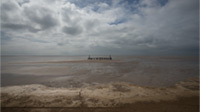
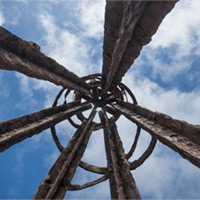
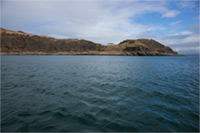
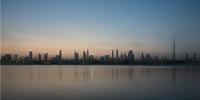
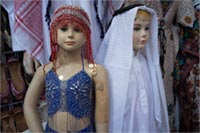
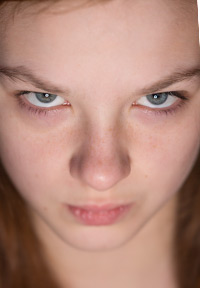
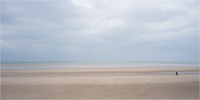
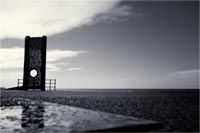
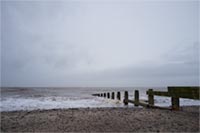
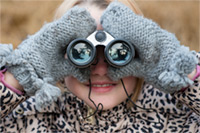
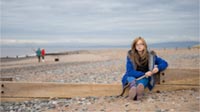
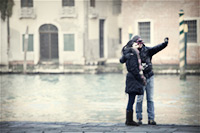
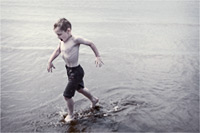
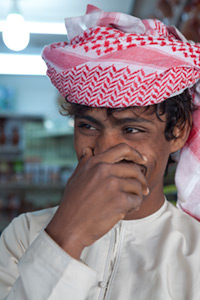
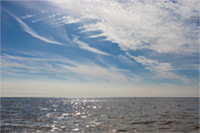
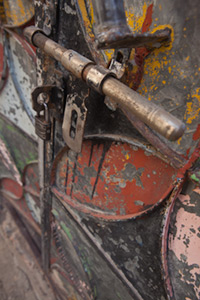
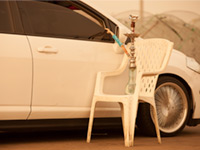
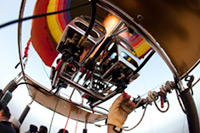
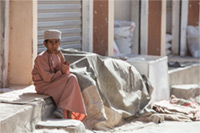
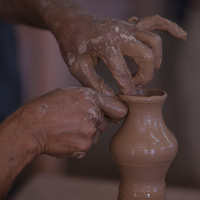
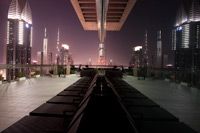
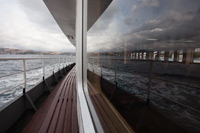
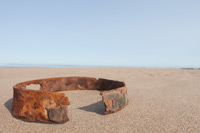
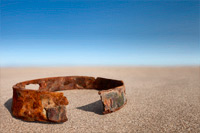
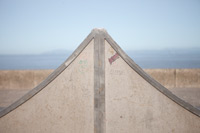
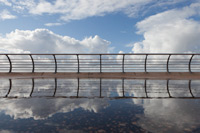
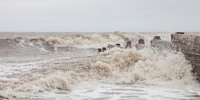
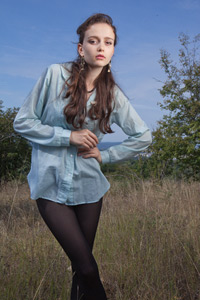
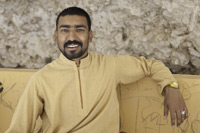
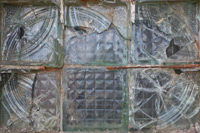
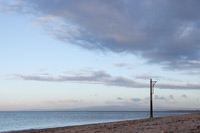
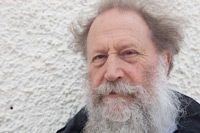
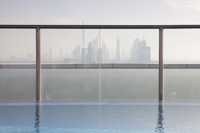
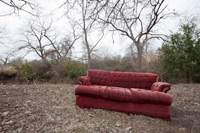
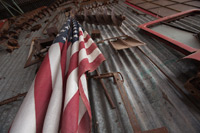
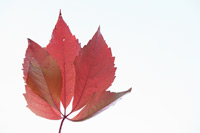
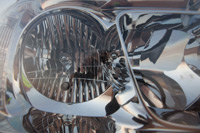
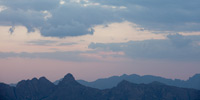
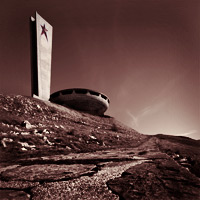
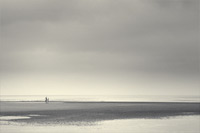
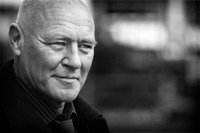
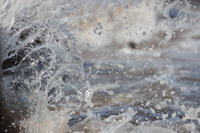
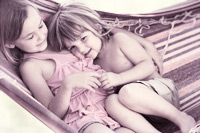
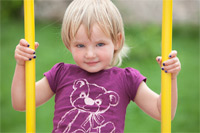
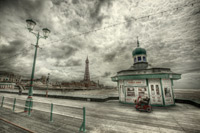
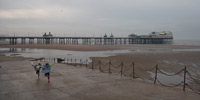
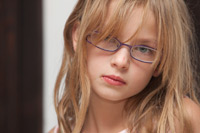
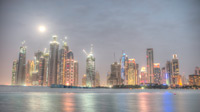
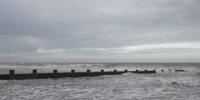
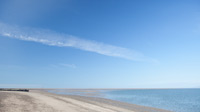
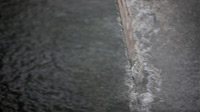
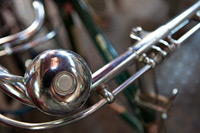
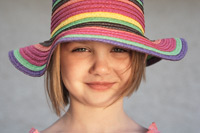
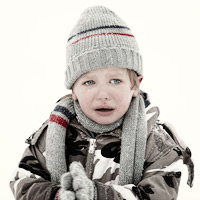
From this …
|
|
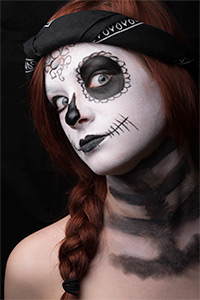
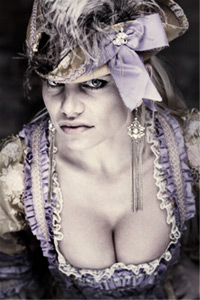
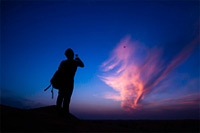
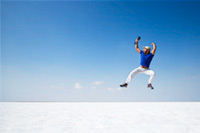
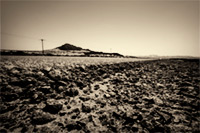
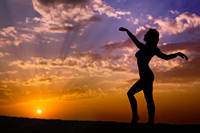
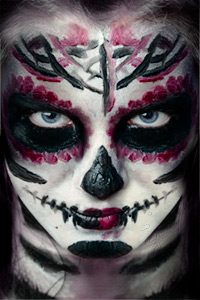
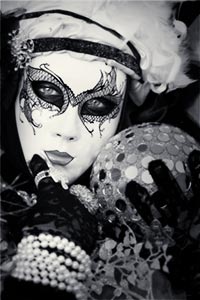
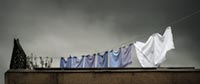
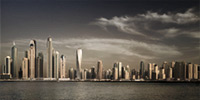
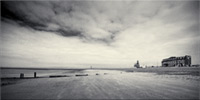
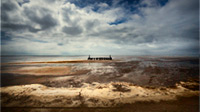
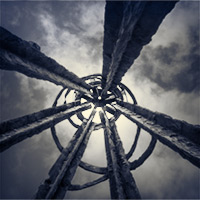
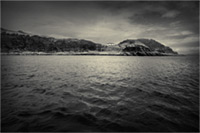
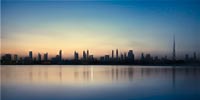
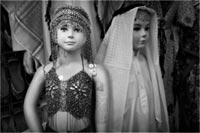
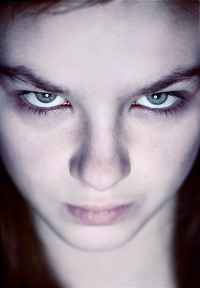
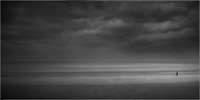
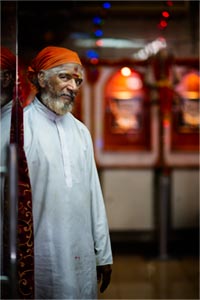
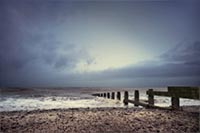
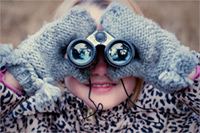
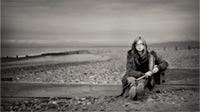
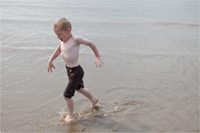
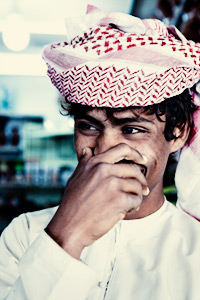
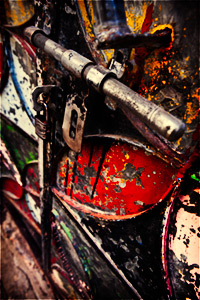
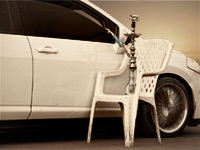
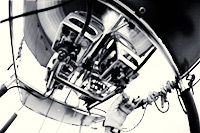
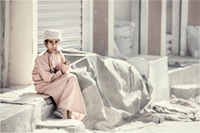
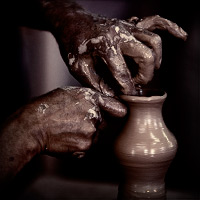
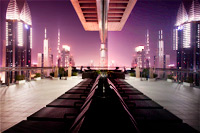
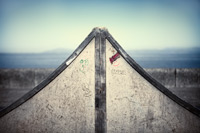
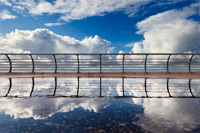
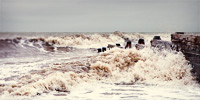
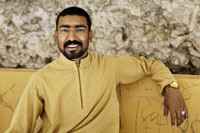
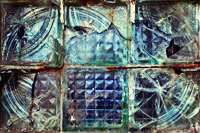
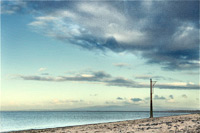
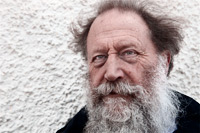
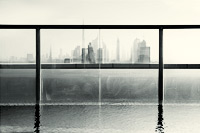
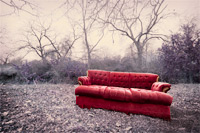
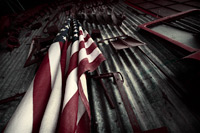
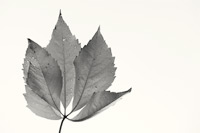
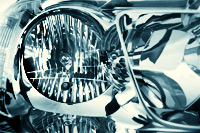
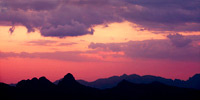
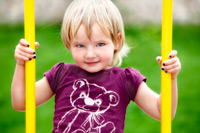
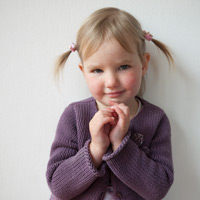
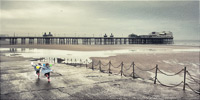
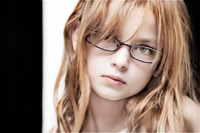
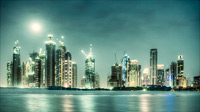
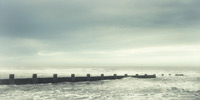
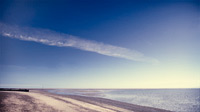
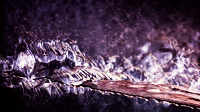
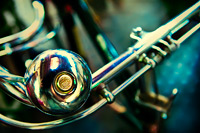
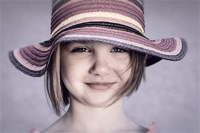
to this
|
|
|  | |  |
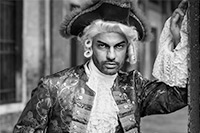
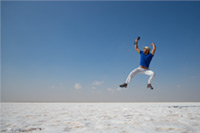
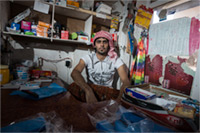
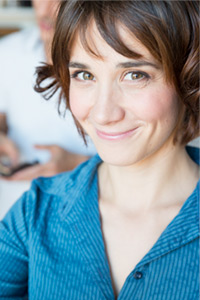
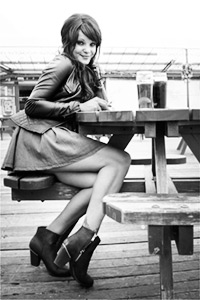
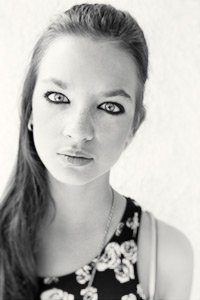
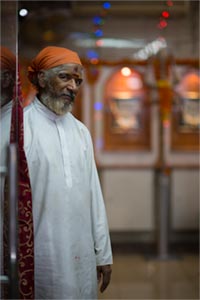
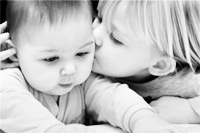
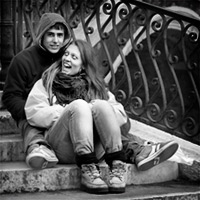
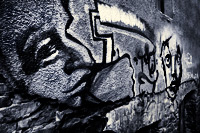
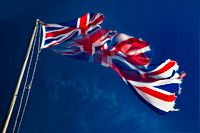
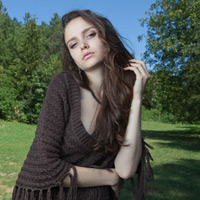
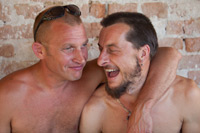
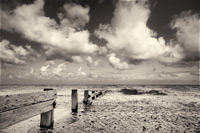
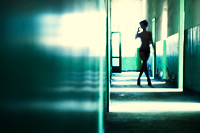
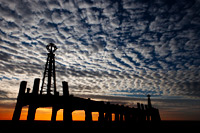
Mini-PSD #219 [uploaded on 13th 2014]
This image was adjusted using ten curves and two Hue/Saturation adjustments.
View a larger version here >>>
|
|  | |  |
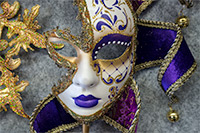
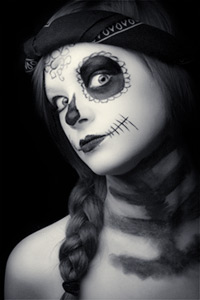
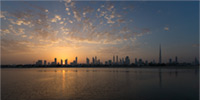
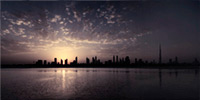
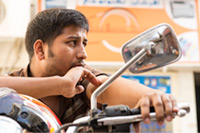
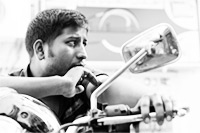
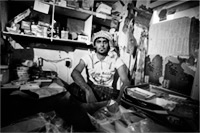
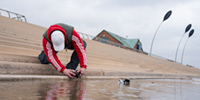
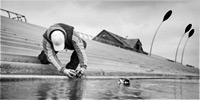
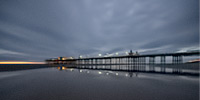
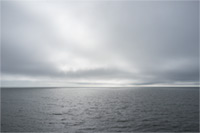
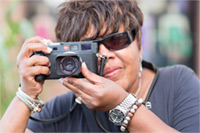
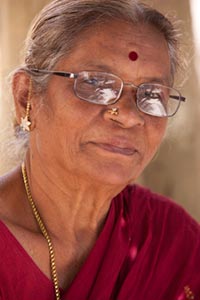
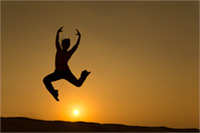
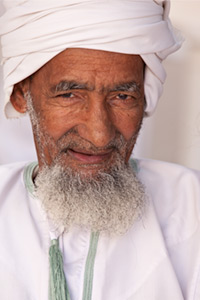
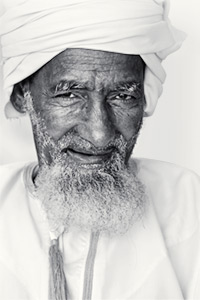
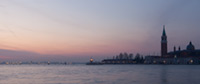
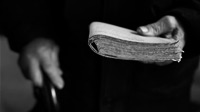
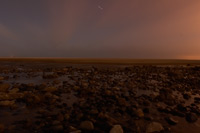
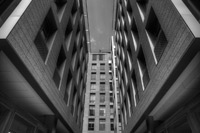
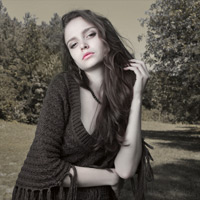
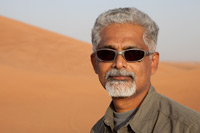
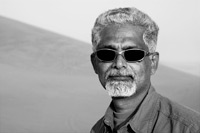
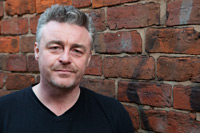
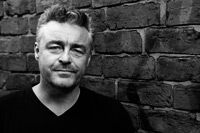
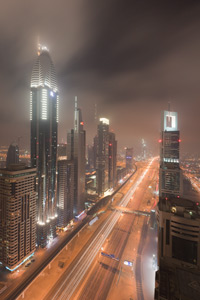
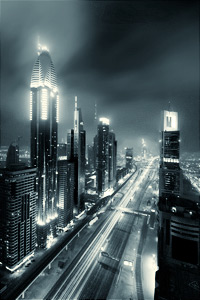
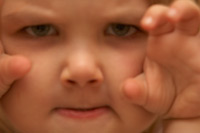
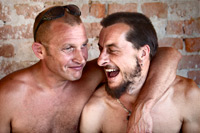
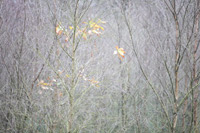
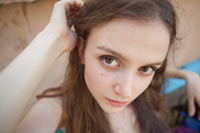
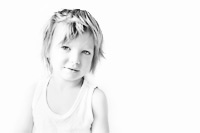
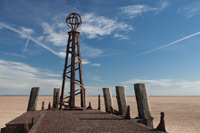
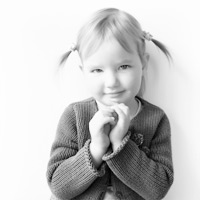
Mini-PSD #218 [uploaded on 13th 2014]
This image was converted to black and white using two Channel Mixer and one Black and White adjustment layer then further adjusted using five curves.
View a larger version here >>>
|
|  | | 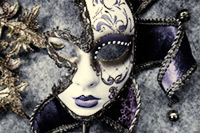 |
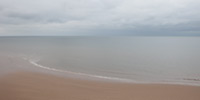
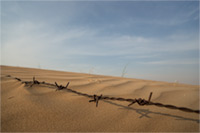
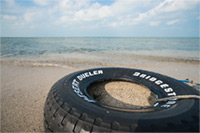
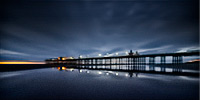
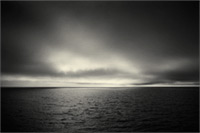
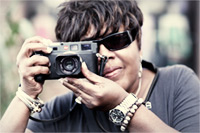
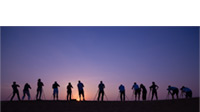
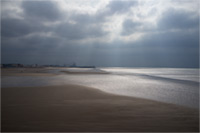
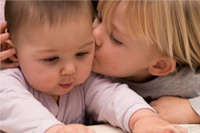
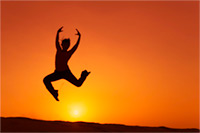
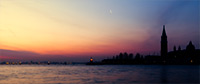
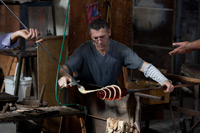
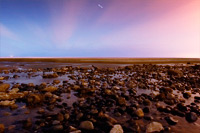
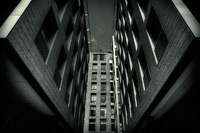
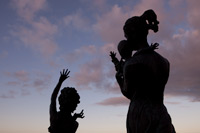
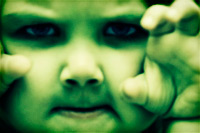
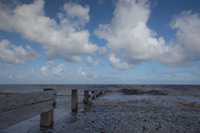
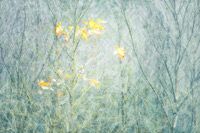
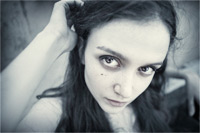
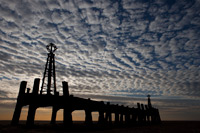
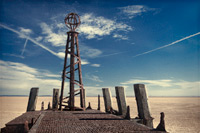
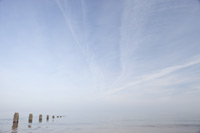
Mini-PSD #217 [uploaded on 13th 2014]
This image was partially desaturated using one Channel Mixer and one Black and White tool adjustment layer then modified with an additional five curves.
View a larger version here >>>
|
| 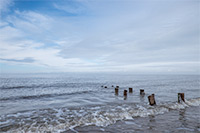 | |  |
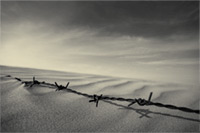
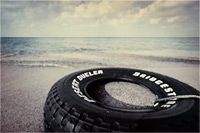
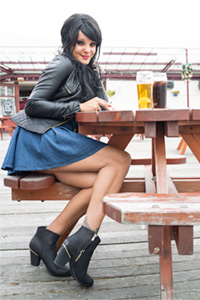
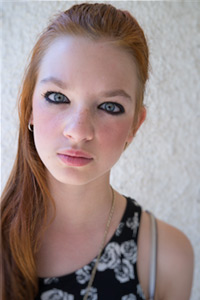
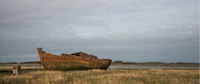
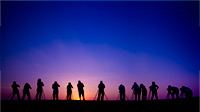
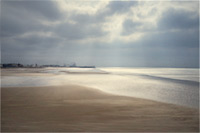
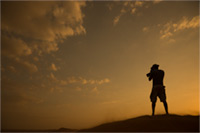
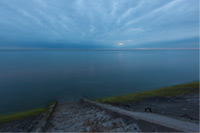
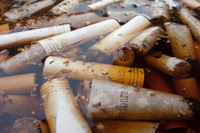
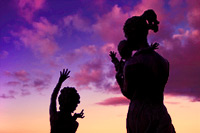
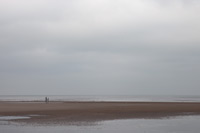
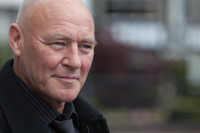
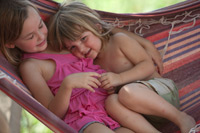
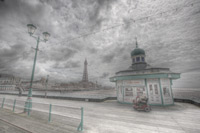
Mini-PSD #216 [uploaded on 13th 2014]
This image was adjusted using nine curves and two Channel Mixer adjustment layers.
View a larger version here >>>
|
|  | |  |
Mini-PSD #215 [uploaded on 13th 2014]
This image was converted to black and white using two Black and White adjustment layers then further adjusted using eight curves.
View a larger version here >>>
|
|  | |  |
Mini-PSD #214 [uploaded on 9th June 2014]
This image was adjusted using seven Curves and one Hue/Saturation adjustment.
View a larger version here >>>
|
|  | |  |
Mini-PSD #213 [uploaded on 14th Apr 2014]
This image was converted to black and white using the black and white tool, recolourised, then adjusted using an additional 13 curves: 12 for contrast, one for tone.
View a larger version here >>>
|
|  | |  |
Mini-PSD #212 [uploaded on 14th Apr 2014]
This image was converted to black and white using the Channel Mixer then adjusted using an additional 12 curves: 11 for contrast, one for tone.
View a larger version here >>>
|
|  | |  |
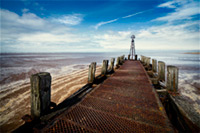
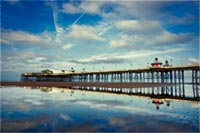
Mini-PSD #211 [uploaded on 31st Mar 2014]
This image was partially desaturated using the Channel Mixer then adjusted using an additional six curves: five for contrast, one for tone.
View a larger version here >>>
|
|  | |  |
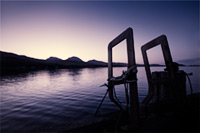
Mini-PSD #210 [uploaded on 31st Mar 2014]
This image was converted to black and white using the Channel Mixer adjustment then adjusted using one masked curve.
View a larger version here >>>
|
|  | |  |
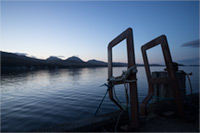
Mini-PSD #209 [uploaded on 31st Mar 2014]
This image was converted to black and white, re-coloured and then further adjusted using an additional nine curves.
View a larger version here >>>
|
|  | |  |
Mini-PSD #208 [uploaded on 31st Mar 2014]
This image was converted to black and white using the Channel Mixer then adjusted using five curves: four for contrast, one for tone.
View a larger version here >>>
|
|  | |  |
Mini-PSD #207 [uploaded on 31st Mar 2014]
This image was adjusted using three curves (two for contrast, one for tone), one Vibrance adjustment layer and one Hue/Saturation adjustment.
View a larger version here >>>
|
|  | |  |
Mini-PSD #206 [uploaded on 31st Mar 2014]
This image was partially desaturated using the Channel Mixer then further adjusted using an additional seven curves.
View a larger version here >>>
|
|  | |  |
Mini-PSD #205 [uploaded on 31st Mar 2014]
This image was adjusted using five curves, one Hue/Saturation adjustment and one Selective Color adjustment layer.
View a larger version here >>>
|
|  | |  |
Mini-PSD #204 [uploaded on 10th Feb 2014]
This image was converted to black and white using two Channel Mixer adjustment layers then adjusted using four curves.
View a larger version here >>>
|
|  | |  |
Mini-PSD #203 [uploaded on 10th Feb 2014]
This image was converted to black and white using two Channel Mixer adjustment layers then adjusted using four curves.
View a larger version here >>>
|
|  | |  |
Mini-PSD #202 [uploaded on 10th Feb 2014]
This image was partially desaturated using two Black and White adjustment layers then adjusted using seven curves: six for contrast, one for tone.
View a larger version here >>>
|
|  | |  |
Mini-PSD #201 [uploaded on 20th Jan 2014]
This image was converted to black and white using the Channel Mixer then adjusted using four curves - three for contrast, one for tone.
View a larger version here >>>
|
|  | |  |
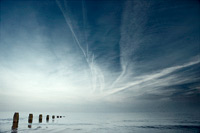
Mini-PSD #200 [uploaded on 13th Jan 2014]
This image was adjusted using five curves - four for contrast, one for toning the upper section of the sky - and one Vibrance adjustment layer.
View a larger version here >>>
|
|  | |  |
Mini-PSD #199 [uploaded on 6th Jan 2014]
This image was converted to black and white using the Hue/Saturation and Black and White tools then further adjusted using four curves: three for contrast, one for tone.
View a larger version here >>>
|
|  | |  |
Mini-PSD #198 [uploaded on 30th Dec 2013]
This image was adjusted using seven curves and two Hue/Saturation adjustment layers.
View a larger version here >>>
|
|  | |  |
Mini-PSD #197 [uploaded on 16th Dec 2013]
This image was converted to black and white using the C then adjusted using five Curves: four for contrast, one for tone.
View a larger version here >>>
|
|  | |  |
Mini-PSD #196 [uploaded on 16th Dec 2013]
This image was converted to black and white using the Black and White tool then adjusted using six Curves: five for contrast, one for tone.
View a larger version here >>>
|
|  | |  |
Mini-PSD #195 [uploaded on 2nd Dec 2013]
This image was converted to black and white using the Channel Mixer then adjusted using five Curves: four for contrast, one for tone.
View a larger version here >>>
|
|  | |  |
Mini-PSD #194 [uploaded on 2nd Dec 2013]
This image was converted to black and white using the Channel Mixer then adjusted using five Curves: four for contrast, one for tone.
View a larger version here >>>
|
|  | |  |
Mini-PSD #193 [uploaded on 2nd Dec 2013]
This image was converted to black and white using the Channel Mixer then adjusted using five Curves: four for contrast, one for tone.
View a larger version here >>>
|
|  | |  |
Mini-PSD #192 [uploaded on 2nd Dec 2013]
This image was converted to black and white using the Channel Mixer then adjusted using five Curves: four for contrast, one for tone.
View a larger version here >>>
|
|  | |  |
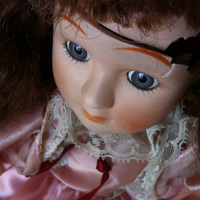
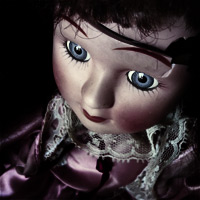
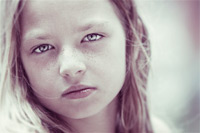
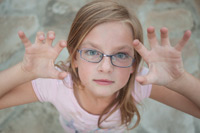
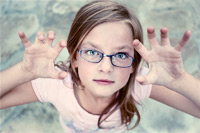
Mini-PSD #191 [uploaded on 4th Nov 2013]
This image, a composite of an original image, and the same image flipped horizontally, was adjusted using six curves, one Hue/Saturation adjustment layer and a Photo Filter layer to intensify the eyes.
View a larger version here >>>
|
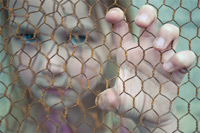
|  | |  |
Mini-PSD #190 [uploaded on 28th Oct 2013]
This image was partially desaturated using the Channel Mixer then adjusted using a further eight curves: seven for contrast, one for tone.
View a larger version here >>>
|
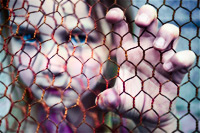
|  | |  |
Mini-PSD #189 [uploaded on 21st Oct 2013]
This image was converted to black and white using the channel mixer then adjusted using six curves: five for contrast, one for tone.
View a larger version here >>>
|
|  | |  |
Mini-PSD #188 [uploaded on 15th Oct 2013]
This image was adjusted using seven curves and three Hue/Saturation adjustment layers.
View a larger version here >>>
|
|  | |  |
Mini-PSD #187 [uploaded on 5th Oct 2013]
This image was perspective corrected than adjusted using nine curves, two Selective Color layers, and one Vibrance adjustment layer.
View a larger version here >>>
|
|  | |  |
Mini-PSD #186 [uploaded on 5th Oct 2013]
This image was converted to black and white using two Channel Mixer adjustment layers then adjusted using fourteen curves.
View a larger version here >>>
|
|  | |  |
Mini-PSD #185 [uploaded on 5th Oct 2013]
This image was converted to black and white using the Channel Mixer then adjusted using two curves. Additionally, a gaussian blurred copy of the background layer was blended using Soft Light mode to soften the overall image.
View a larger version here >>>
|
|  | |  |
Mini-PSD #184 [uploaded on 5th Oct 2013]
This image was adjusted using six curves and one vibrance adjustment layer.
View a larger version here >>>
|
|  | |  |
Mini-PSD #183 [uploaded on 5th Oct 2013]
This image was converted to black and white using the Channel Mixer then further adjusted using six curves.
View a larger version here >>>
|
|  | |  |
Mini-PSD #182 [uploaded on 5th Oct 2013]
This image was converted to black and white using the Hue/Saturation tool then adjusted using six curves: five for contrast, one for tone.
View a larger version here >>>
|
|  | |  |
Mini-PSD #181 [uploaded on 5th Oct 2013]
This image was converted to black and white using the Black and White tool then adjusted using seven curves: six for contrast, one for tone.
View a larger version here >>>
|
|  | |  |
Mini-PSD #180 [uploaded on 5th Oct 2013]
This image was partially desaturated using the Channel Mixer then further adjusted using three curves: two for contrast, one for tone.
View a larger version here >>>
|
|  | |  |
Mini-PSD #179 [uploaded on 25th July 2013]
This image was converted to black and white using Channel Mixer then adjusted using eight curves: seven for contrast, one for tone.
View a larger version here >>>
|
|  | |  |
Mini-PSD #178 [uploaded on 25th July 2013]
This image was converted to black and white using the Black and White tool then adjusted using five curves: four for contrast, one for tone.
View a larger version here >>>
|
|  | |  |
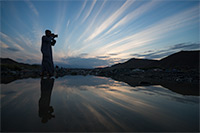
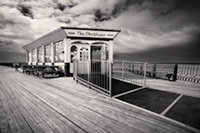
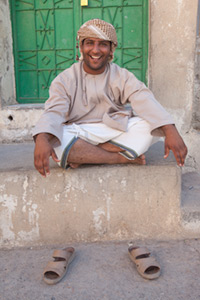
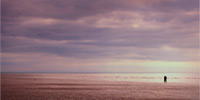
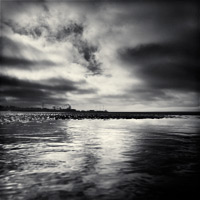
Mini-PSD #177 [uploaded on 9th July 2013]
This image was adjusted using five curves, one Hue/Saturation adjustment layer and one Selective Color layer. Additionally, a Black and White adjustment layer was used to alter the tonal balance of the foreground relative to the sky.
View a larger version here >>>
|
|  | |  |
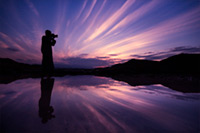
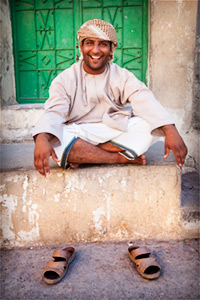
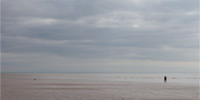
Mini-PSD #176 [uploaded on 9th July 2013]
This image was adjusted using five curves, one Hue/Saturation adjustment layer and one Selective Color layer. Additionally, a Black and White adjustment layer was used to alter the tonal balance of the foreground relative to the sky.
View a larger version here >>>
|
|  | |  |
Mini-PSD #175 [uploaded on 1st July 2013]
This image was converted to black and white using the Black and White tool then adjusted using ten curves: nine for contrast, one for tone.
View a larger version here >>>
|
|  | |  |
Mini-PSD #174 [uploaded on 24th June 2013]
This image was adjusted using eight curves, two Hue/Saturation adjustment layers, and one Selective Color layer.
View a larger version here >>>
|
|  | |  |
Mini-PSD #173 [uploaded on 17th June 2013]
This image was partially converted to black and white using the Channel Mixer then further adjusted using one Vibrance adjustment layer and eight Curves: seven for contrast, one for tone.
View a larger version here >>>
|
|  | |  |
Mini-PSD #172 [uploaded on 10th June 2013]
This image was converted to black and white using the Channel Mixer and Black and White tool, then further adjusted using one Selective Color adjustment layer and nine Curves: eight for contrast, one for tone.
View a larger version here >>>
|
|  | |  |
Mini-PSD #171 [uploaded on 3rd June 2013]
This image adjusted using two Selective Color adjustment layers (to darken the sky), two Hue/Saturation adjustments, and two curves (one global, one to add a vignette).
View a larger version here >>>
|
|  | |  |
Mini-PSD #170 [uploaded on 27th May 2013]
This image was converted to black and white using two Channel Mixer adjustment layers then further modified using one Selective Color adjustment layer and eight curves: seven for contrast, one for tone.
View a larger version here >>>
|
|  | |  |
Mini-PSD #169 [uploaded on 20th May 2013]
This image was adjusted using eleven curves and two Hue/Saturation adjustment layers.
View a larger version here >>>
|
|  | |  |
Mini-PSD #168 [uploaded on 13th May 2013]
This image was converted to black and white using the channel mixer the adjusted using a further seven curves: six for contrast, one for tone.
View a larger version here >>>
|
|  | |  |
Mini-PSD #167 [uploaded on 6th May 2013]
This image was converted to black and white then adjusted using a further seven curves: six for contrast, one for tone.
View a larger version here >>>
|
|  | |  |
Mini-PSD #166 [uploaded on 28th April 2013]
After extending the sky, and cloning out some distracting elements, this image was adjusted using three Curves and two Hue/Saturation adjustment layers.
View a larger version here >>>
|
|  | |  |
Mini-PSD #165 [uploaded on 22nd April 2013]
This image was adjusted using seven curves (six for contrast and one for tone), one Hue/Saturation adjustment layer and one Selective Color adjustment layer .
View a larger version here >>>
|
|  | |  |
Mini-PSD #164 [uploaded on 15th April 2013]
This image was converted to black and white using the Channel Mixer, then further adjusted using 12 curves.
View a larger version here >>>
|
|  | |  |
Mini-PSD #163 [uploaded on 1st April 2013]
This image was converted to black and white using two Channel Mixer adjustment layers, then further adjusted using six masked curves.
View a larger version here >>>
|
|  | |  |
Mini-PSD #162 [uploaded on 1st April 2013]
This image was converted to black and white using the Hue/Saturation tool and Channel Mixer, recolourized, then further adjusted using five additional curves: four for contrast, one for tone.
View a larger version here >>>
|
|  | |  |
Mini-PSD #161 [uploaded on 24th March 2013]
This image was converted to black and white using the Channel Mixer, then adjusted using nine additional curves.
View a larger version here >>>
|
|  | |  |
Mini-PSD #160 [uploaded on 24th March 2013]
This image was adjusted using 12 masked Curves, 11 for contrast, one for tone.
View a larger version here >>>
|
|  | |  |
Mini-PSD #159 [uploaded on 15th March 2013]
This image was adjusted using five masked Curves.
View a larger version here >>>
|
|  | |  |
Mini-PSD #158 [uploaded on 15th March 2013]
This image was adjusted using three Curves, one Hue/Saturation adjustment layer, and one Selective Color adjustment layer.
View a larger version here >>>
|
|  | |  |
Mini-PSD #157 [uploaded on 15th March 2013]
This image was adjusted using two Curves and a Hue/Saturation adjustment layer.
View a larger version here >>>
|
|  | |  |
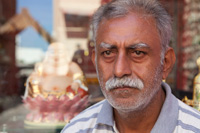
Mini-PSD #156 [uploaded on 20th Feb 2013]
This image was converted to black and white using the Channel Mixer then adjusted using three curves: two for contrast, one for tone.
View a larger version here >>>
|
|  | |  |
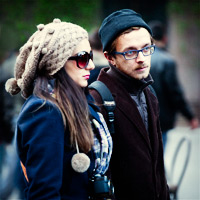
Mini-PSD #155 [uploaded on 20th Feb 2013]
This image was adjusted using one Selective Color adjustment layer to darken the sky, a Channel Mixer adjustment to convert the image to black and white (biased towards the red channel), and then six curves adjustments: five for contrast, one for tone..
View a larger version here >>>
|
|  | |  |
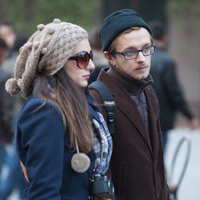
Mini-PSD #154 [uploaded on 20th Feb 2013]
This image was partially desaturated using the Channel Mixer then further adjusted using five curves: four for contrast, one for tone..
View a larger version here >>>
|
|  | |  |
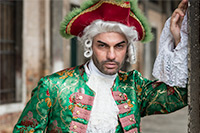
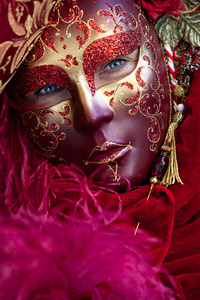
Mini-PSD #153 [uploaded on 20th Feb 2013]
This image was adjusted using six curves (five for contrast, one for tone), and an additional Vibrance adjustment layer to increase the saturation of the upper sections of her costume.
View a larger version here >>>
|
|  | |  |
Mini-PSD #152 [uploaded on 20th Feb 2013]
This image was partially desaturated using the Channel Mixer then further adjusted using nine curves: eight for contrast, one for tone.
View a larger version here >>>
|
|  | |  |
Mini-PSD #151 [uploaded on 14th Jan 2013]
This image was adjust using three curves: one for contrast, one for tone, and one to bring out the detail in her earring.
View a larger version here >>>
|
|  | |  |
Mini-PSD #150 [uploaded on 8th Jan 2013]
This image was converted to black and white using the Hue/Saturation tool and the Black and White tool, then adjusted using four masked curves.
View a larger version here >>>
|
|  | |  |
Mini-PSD #149 [uploaded on 3rd Jan 2013]
This image was transformed using curves: two for contrast, one for tone.
View a larger version here >>>
|
|  | |  |
Mini-PSD #148 [uploaded on 3rd Jan 2013]
This image was on two RAW conversions with different white balance settings. It was then further adjusted using three Curves and two Hue/Saturation adjustments.
View a larger version here >>>
|
|  | |  |
Mini-PSD #147 [uploaded on 16th Dec 2012]
This image was transformed using three Hue/Saturation adjustment layers and seven curves: six for contrast, one for tone.
View a larger version here >>>
|
|  | |  |
Mini-PSD #146 [uploaded on 10th Dec 2012]
This image was transformed using one Channel Mixer adjustment layer (to alter the tonal balance), one Hue/Saturation adjustment layer, and two Curves: one for contrast, one for tone.
View a larger version here >>>
|
|  | |  |
Mini-PSD #145 [uploaded on 6th Dec 2012]
This image was adjusted using one Vibrance adjustment layer, three Hue/Saturation adjustments and ten Curves: nine for contrast, one for tone.
View a larger version here >>>
|
|  | |  |
Mini-PSD #144 [uploaded on 26th Nov 2012]
This image was transformed using the skew tool then adjusted using four curves (three of contrast, one for tone) and a hue/saturation adjustment layer to add a mild boost to the saturation.
View a larger version here >>>
|
|  | |  |
Mini-PSD #143 [uploaded on 21st Nov 2012]
This image was converted to black and white using three Channel Mixer conversions then further adjusted using seven Curves (six for contrast, one for tone).
View a larger version here >>>
|
|  | |  |
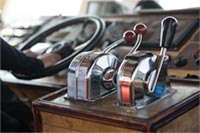
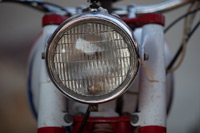
Mini-PSD #142 [uploaded on 21st Nov 2012]
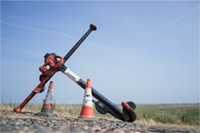
This image was adjusted using five Curves (four for contrast, one for tone), a Hue/Saturation adjustment layer to partially desaturate the background, and Topaz Detail to bring out the fine scale detail in the binoculars.
View a larger version here >>>
|
|  | |  |
Mini-PSD #141 [uploaded on 21st Nov 2012]
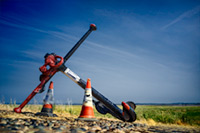
This image was converted to black and white using the Channel Mixer then adjusted with two Curves, one for contrast, one for tone. Additional blur was added using the Bokeh 2 plugin from Alien Skin and the Guassian Blur filter.
View a larger version here >>>
|
|  | |  |
Mini-PSD #140 [uploaded on 27th Oct 2012]
This image was converted to black and white using two channel mixer adjustment layers and 11 curves, 10 for contrast, one for tone.
View a larger version here >>>
|
|  | |  |
Mini-PSD #139 [uploaded on 20th Oct 2012]
This image was adjusted using nine curves (eight for contrast, one for tone), a Hue/Saturation adjustment layer (to partially desaturate the reds in two specific areas of the image), and a Vibrance adjustment layer to boost the saturation of the more muted colours.
View a larger version here >>>
|
|  | |  |
Mini-PSD #138 [uploaded on 13th Oct 2012]
This image was adjusted using four curves (three for contrast, one for tone) and a hue/saturation adjustment layer to marginally desaturate the reds.
View a larger version here >>>
|
|  | |  |
Mini-PSD #136 [uploaded on 7th Oct 2012]
The canvas for this image was extended to a 2x1 aspect ratio then adjusted using five curves: four for contrast, one for tone.
View a larger version here >>>
|
|  | |  |
Mini-PSD #136 [uploaded on 1st Oct 2012]
This image was partially desaturated using the Channel Mixer then adjusted using seven curves: six for contrast, one for tone.
View a larger version here >>>
|
|  | |  |
Mini-PSD #135 [uploaded on 25th Sept 2012]
This image was adjusted using nine curves (eight for contrast, one for tone) and two Hue/Saturation adjustment layers. Additionally, Topaz Detail was used to bring out the detail in the buildings and foreground.
View a larger version here >>>
|
|  | |  |
Mini-PSD #134 [uploaded on 17th Sept 2012]
This image was desaturated using two Channel Mixer adjustment layers, partially re-colourised using the original image set to Color Blend mode, then adjusted using a further seven curves (six for contrast and one for tone).
View a larger version here >>>
|
|  | |  |
Mini-PSD #133 [uploaded on 10th Sept 2012]
This image was partially desaturated using the Channel Mixer then adjusted using a further six curves: five for contrast and one to add the 'cross-processed' like tone.
View a larger version here >>>
|
|  | |  |
Mini-PSD #132 [uploaded on 3rd Sept 2012]
This image was converted to black and white using the black and white tool then adjusted using a further five curves: four for contrast, one of tone.
View a larger version here >>>
|
|  | |  |
Mini-PSD #131 [uploaded on 27th Aug 2012]
This image was converted to black and white using the Channel Mixer then modified using six curves: five for contrast, one for tone.
View a larger version here >>>
|
|  | |  |
Mini-PSD #130 [uploaded on 20th Aug 2012]
This image was modified using eight curves and two hue/saturation adjustment layers.
View a larger version here >>>
|
| 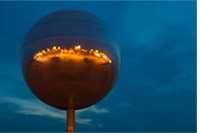 | | 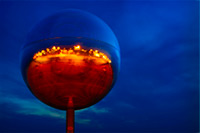 |
Mini-PSD #129 [uploaded on 13th Aug 2012]
"They shoot horses don't they?" is the world's largest mirror ball, located in Blackpool, UK. The final image was adjusted using a range of Curves, Hue/Saturation, Vibrance and Selective Color adjustments. A relatively minor change was also made by altering the colours in Lab Color mode before returning to the RGB image.
View a larger version here >>>
|
| 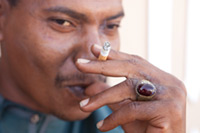 | | 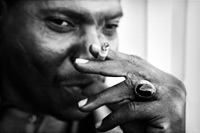 |
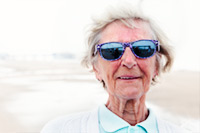
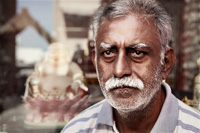
Mini-PSD #128 [uploaded on 6th Aug 2012]
This is a shot of the same guy as used for Mini-PSD #118. It was converted to black and white using the channel mixer then adjusted using six curves.
View a larger version here >>>
|
|  | |  |
Mini-PSD #127 [uploaded on 1st August 2012]
This image was converted to black and white using two blended Channel Mixer adjustments then further adjusted using six Curves.
View a larger version here >>>
|
|  | |  |
Mini-PSD #126 [uploaded on 24th July 2012]
This image was adjusted using six masked curves.
View a larger version here >>>
|
|  | |  |
Mini-PSD #125 [uploaded on 16th July 2012]
This image was adjusted using six curves and two Channel Mixer adjustment layers.
View a larger version here >>>
|
|  | |  |
Mini-PSD #124 [uploaded on 9th July 2012]
This image was adjusted using 15 Curves (most of which were targeted at specific sections of specific buildings) and two hue/saturation adjustment layers.
View a larger version here >>>
|
|  | |  |
Mini-PSD #123 [uploaded on 10th June 2012]
This image was converted to black and white using the Channel Mixer then further adjusted using five masked curves.
View a larger version here >>>
|
|  | |  |
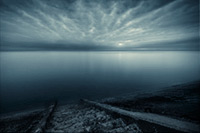
Mini-PSD #122 [uploaded on 4th June 2012]
This image was adjusted using four curves – two for contrast, two for tone – and then the saturation was boosted using the Channel Mixer. Additionally, the moon was moved from the upper section of the original frame to include it within the panoramic crop.
View a larger version here >>>
|
|  | |  |
Mini-PSD #121 [uploaded on 28th May 2012]
This image was converted to black and white using the Channel Mixer then adjusted using 11 Curves (10 for contrast, and one for tone. In addition Nik Software's Dfine 2.0 was used to reduce noise, Topaz Detail was used to enhance the detail in the foreground and sky, and some additional gaussian blur was added to the water.
View a larger version here >>>
|
|  | |  |
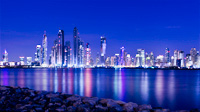
Mini-PSD #120 [uploaded on 21st May 2012]
This image was adjusted using 8 Curves (6 for contrast, and two for tone), and one Hue/Saturation adjustment layer to boost the saturation.
View a larger version here >>>
|
|  | |  |
Mini-PSD #119 [uploaded on 14th May 2012]
This image was adjusted using 11 Curves (10 for contrast, and one for tone), and one Channel Mixer adjustment layer to boost the saturation.
View a larger version here >>>
|
|  | |  |
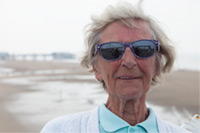
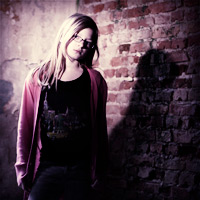
Mini-PSD #118 [uploaded on 7th May 2012]
This image was partially desaturated using one Channel Mixer adjustment layer and one Hue/Saturation layer the further adjusted using four Curves: three for contrast, one for tone.
View a larger version here >>>
|
|  | |  |
Mini-PSD #117 [uploaded on 30th Apr. 2012]
This image was adjusted using five curves: one for a (mostly) global adjustment in brightness and contrast, the other four to selectively alter different sections of the image.
View a larger version here >>>
|
|  | |  |
Mini-PSD #116 [uploaded on 16th Apr. 2012]
This image was adjusted using one hue/saturation adjustment layer and nine curves: eight for contrast, one for tone.
View a larger version here >>>
|
|  | |  |
Mini-PSD #115 [uploaded on 16th Apr. 2012]
This image was adjusted using five hue/saturation adjustment layers and six curves: five for contrast, one for tone. Additionally, Topaz Detail was used to enhance the fine scale detail and the background (top-right) was replaced using a frame from the same shoot.
View a larger version here >>>
|
|  | |  |
Mini-PSD #114 [uploaded on 9th Apr. 2012]
This image was converted to black and white using two Channel Mixer adjustment layers then adjusted using six curves; five for contrast, one for tone.
View a larger version here >>>
|
|  | |  |
Mini-PSD #113 [uploaded on 2nd Apr. 2012]
This image was partially desaturated using the Channel Mixer and then further adjusted using four masked Curves for contrast and a final Curve for tone.
View a larger version here >>>
|
|  | |  |
Mini-PSD #112 [uploaded on 26th Mar. 2012]
This image was adjusted using six curves – four for contrast and two for tone – and one Hue/Saturation adjustment layer (to partially desaturate the background). The key adjustment is Curves 1, a very steep S-Curve which greatly increases the contrast between the lightest and darkest areas.
View a larger version here >>>
|
|  | |  |
Mini-PSD #111 [uploaded on 23rd Mar. 2012]
This image was adjusted using just ... you can download this one and see for yourself ;)
View a larger version here >>>
|
|  | |  |
Mini-PSD #110 [uploaded on 23rd Mar. 2012]
This image was adjusted using nine curves and one Channel Mixer adjustment layer to boost the saturation, especially in the top-right quadrant of the image. Additionally, Topaz Detail was used to enhance the fine scale detail.
View a larger version here >>>
|
|  | |  |
Mini-PSD #109 [uploaded on 23rd Mar. 2012]
This image was converted to black and white using the Channel Mixer then adjusted using just two curves.
View a larger version here >>>
|
|  | |  |
Mini-PSD #108 [uploaded on 23rd Mar. 2012]
This image was adjusted using ten Curves - nine for contrast, one for tone - and one Channel Mixer adjustment layer to partially desaturate the image.
View a larger version here >>>
|
|  | |  |
Mini-PSD #107 [uploaded on 23rd Mar. 2012]
This image was adjusted using five Curves: four for contrast, one for tone.
View a larger version here >>>
|
|  | |  |
Mini-PSD #106 [uploaded on 27th Feb. 2012]
This image was adjusted using six Curves: one for overall contrast, one to add more light to the left side of the image, one to add a mild vignette, and three to brighten/adjust the eyes.
View a larger version here >>>
|
|  | |  |
Mini-PSD #105 [uploaded on 6th Feb. 2012]
This image was adjusted using three Curves adjustments (two for contrast, one for tone), one Hue/Saturation adjustment layer and one Channel Mixer adjustment layer.
View a larger version here >>>
|
|  | |  |
Mini-PSD #104 [uploaded on 30th Jan. 2012]
This image was partially desaturated using a Channel Mixer adjustment layer then adjusted using a further four curves: three for contrast (face, eyes and a vignette) and one for tone.
View a larger version here >>>
|
|  | |  |
Mini-PSD #103 [uploaded on 23rd Jan. 2012]
This image was adjusted using 6 Curves adjustment and one image layer to modify the colour of in specific areas of the image. The key adjustments are Curves 4, 5, 6 and 7, all of which make minor changes to specific areas of the buildings.
View a larger version here >>>
|
|  | |  |
Mini-PSD #102 [uploaded on 16th Jan. 2012]
This image was adjusted using 12 curves: 11 for contrast, one for tone.
View a larger version here >>>
|
|  | |  |
Mini-PSD #101 [uploaded on 9th Jan. 2012]
This image was converted to black and white using two Channel Mixer layers (to balance the tonal range of different sections of the image) then adjusted using three masked curves for contrast.
View a larger version here >>>
|
| 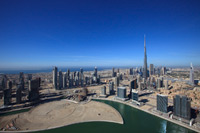 | | 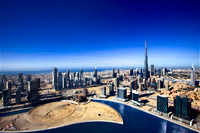 |
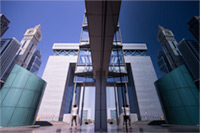
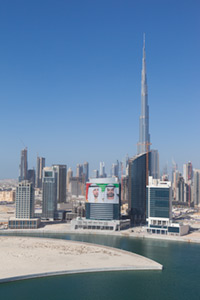
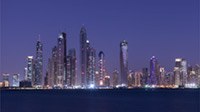
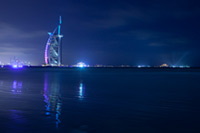
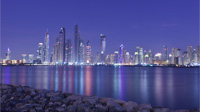
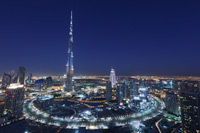
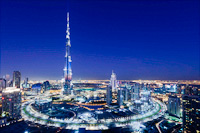
Mini-PSD #100 [uploaded on 2nd Jan. 2012]
This image was adjusted using 13 Curves, three Hue/Saturation adjustments, and one Channel Mixer adjustment. In addition the water in the foreground was changed using a solid colour layer and the Burj Khalifa was straightened using the Warp tool.
View a larger version here >>>
|
|  | |  |
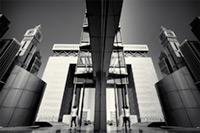
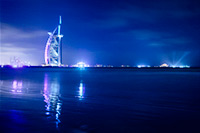
Mini-PSD #99 [uploaded on 19th Dec. 2011]
This image was adjusted using 14 Curves (13 for contrast, one for tone), one Hue/Saturation adjustment layer, and one Selective Color adjustment. It was converted to black and white using the Black and White tool.
View a larger version here >>>
|
|  | | 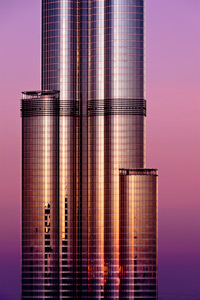 |
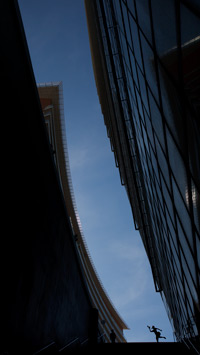
Mini-PSD #98 [uploaded on 12th Dec. 2011]
This shot of the Burj Khalifa - the world's tallest building - was adjusted using seven curves, six for contrast and one for tone, and then a slight increase in saturation was added using the Hue/Saturation tool. Additionally, the content was skewed using the Transform tool to straighten the rightmost edge of the Burj.
View a larger version here >>>
|
| 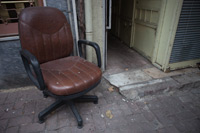 | |  |
Mini-PSD #97 [uploaded on 5th Dec. 2011]
This image was adjusted using eight Curves, seven for contrast and one for tone, and one Channel Mixer adjustment layer to partially desaturate the image. The key layer is 'Curves 6', used to brighten and add contrast to the back of the chair.
View a larger version here >>>
|
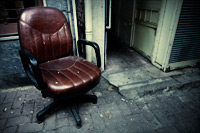
|  | |  |
Mini-PSD #96 [uploaded on 28th Nov. 2011]
This image was adjusted using two Curves for contrast, one for tone, one Selective Color adjustment and one Channel Mixer adjustment layer.
View a larger version here >>>
|
|  | |  |
Mini-PSD #95 [uploaded on 24th Nov. 2011]
This image was straightened using the Transform tool then adjusted using ten Curves adjustment layers (for global and selective contrast) and one Hue/Saturation adjustment layer to add a mild increase in saturation. Additionally, Topaz Detail was used to enhance the fine scale detail.
View a larger version here >>>
|
|  | |  |
Mini-PSD #94 [uploaded on 6th Nov. 2011]
This image was converted to black and white using the Channel Mixer then adjusted with a further four Curves. Additionally, Topaz Detail was used to enhance the detail in the foreground and I increased the separation between the foreground and background using Bokeh.
View a larger version here >>>
|
|  | |  |
Mini-PSD #93 [uploaded on 31st Oct. 2011]
This image was converted to black and white using the Channel Mixer then adjusted with a further 11 Curves: 10 for contrast, one of tone.
View a larger version here >>>
|
|  | |  |
Mini-PSD #92 [uploaded on 24th Oct. 2011]
This image was adjusted using four masked curves and two Hue/Saturation adjustment layers. Additionally, additional blur was added to the background.
View a larger version here >>>
|
|  | |  |
Mini-PSD #91 [uploaded on 17th Oct. 2011]
This image was converted to black and white using the Channel Mixer then further adjusted using eight curves (take a look at Curves 5, used to 'remove' the bright piece of grass in the foreground). Additionally, Bokeh was used to add a small amount of additional blur to the background.
View a larger version here >>>
|
|  | |  |
Mini-PSD #90 [uploaded on 10th Oct. 2011]
This image was adjusted using seven Curves adjustments (six for contrast, one for tone), and two Hue/Saturation adjustment layers. Additionally, Topaz Detail was used to enhance the fine scale detail.
View a larger version here >>>
|
|  | |  |
Mini-PSD #89 [uploaded on 4th Oct. 2011]
This image was adjusted using six Curves and one Hue/Saturation adjustment layer. In addition, the content of the bottom half of the image was transformed to lessen the gap between the clouds and their reflection.
View a larger version here >>>
|
| 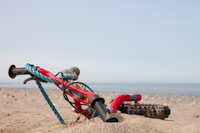 | | 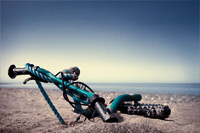 |
Mini-PSD #88 [uploaded on 26th Sept. 2011]
This image was processed using 11 adjustment layers: seven curves, for contrast and tone, one channel mixer adjustment to partially desaturate the image, two hue/saturation adjustments to tweak the colour balance, and an invert layer to change the colour of the bike.
View a larger version here >>>
|
|  | |  |
Mini-PSD #87 [uploaded on 19th Sept. 2011]
This image was converted to black and white using the Channel Mixer and then further adjusted using nine Curves: eight for contrast, one for tone.
View a larger version here >>>
|
|  | |  |
Mini-PSD #86 [uploaded on 12th Sept. 2011]
This image was converted to black and white by blending two Channel Mixer conversions and one Hue/Saturation adjustment. It was then modified using an additional nine curves: eight for contrast and one for tone.
View a larger version here >>>
|
|  | |  |
Mini-PSD #85 [uploaded on 5th Sept. 2011]
This image was processed using just three adjustment layers: a Levels adjustment to extend the tonal range, and then two curves: the first to 'colour correct' and increase contrast in the foreground, the second to do the same for the sky.
View a larger version here >>>
|
|  | |  |
Mini-PSD #84 [uploaded on 29th August 2011]
This image was adjusted using ten curves, two channel mixer adjustments, and one Hue/Saturation adjustment layer. Additionally, Topaz Adjust was used to enhance the fine scale detail.
View a larger version here >>>
|
|  | |  |
Mini-PSD #83 [uploaded on 22nd August 2011]
This image was adjusted using six curves - five for contrast, and one for tone - and one Hue/Saturation adjustment layer. Additionally, Topaz Detail was used to enhance the fine scale detail and some additional blur was added using Alien Skin's Bokeh.
View a larger version here >>>
|
|  | |  |
Mini-PSD #82 [uploaded on 15th August 2011]
This image was partially desaturated using the Channel Mixer then adjusted using a further seven adjustment layers: five curves for contrast, one for tone and a Selective Color adjustment layer to further desaturate the reds. Additionally, Topaz Detail was used to enhance the fine scale detail.
View a larger version here >>>
|
|  | |  |
Mini-PSD #81 [uploaded on 8th August 2011]
This image is a composite of six original shots, each of which was transformed prior to being added to the image. The final/composite image was then adjusted using two masked curves.
View a larger version here >>>
|
|  | |  |
Mini-PSD #80 [uploaded on 1st August 2011]
This Mini-PSD illustrates the changes that were made to a black and white tonemapped image (constructed from a seven-shot bracketed sequence using Photomatix Pro).
View a larger version here >>>
|
|  | |  |
Mini-PSD #79 [uploaded on 25th July 2011]
This Lab Color image was adjusted using just two curves: one for colour, and one to lighten Iva's face.
View a larger version here >>>
|
|  | |  |
Mini-PSD #78 [uploaded on 25th July 2011]
This, the first of two related Mini-PSDs, was converted to Lab Color mode then adjusted using four curves: one global curve to alter the colour, then three masked curves to vary the contrast in different sections of the image.
View a larger version here >>>
|
|
|
|

|
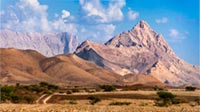
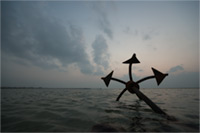
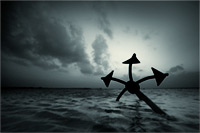
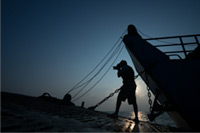
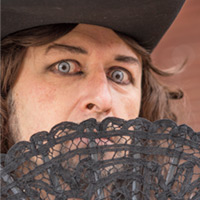
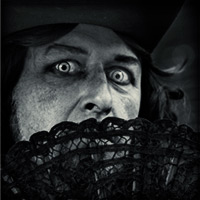
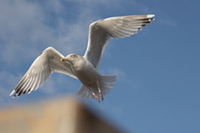
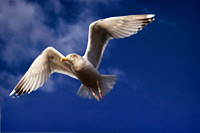
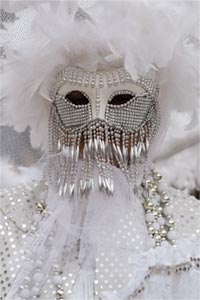
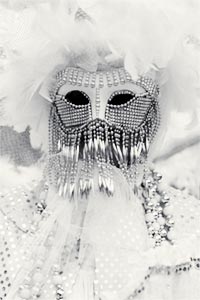
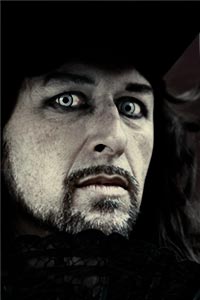
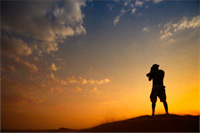
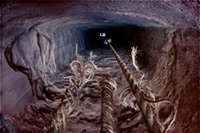
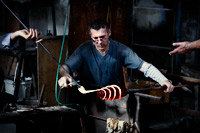
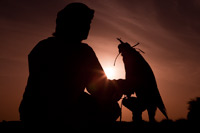
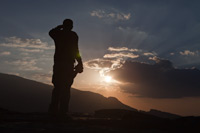
Mini-PSD #77 [uploaded on 11th July 2011]
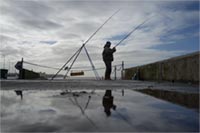
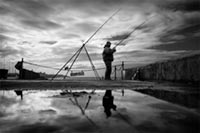
This image, a shot of a falconer at the Bab Al Shams resort near Dubai, was constructed from two originals: one for the main image, and another to replace the falcon's head. There were also some additional changes to the content, after which the image was adjusted using three main curves: two for contrast, one for tone.
View a larger version here >>>
|
|

|
|
|
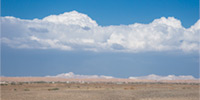
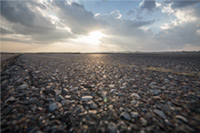
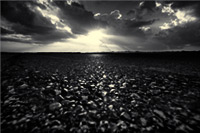
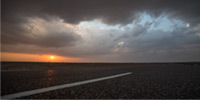
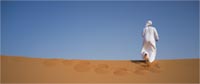
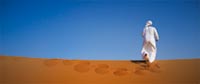
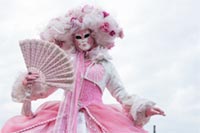
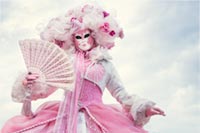
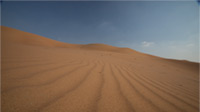
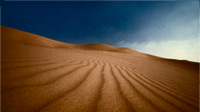
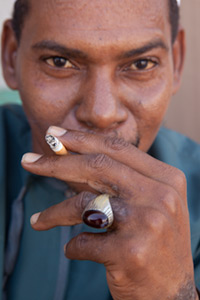
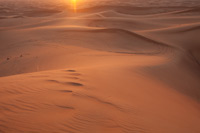
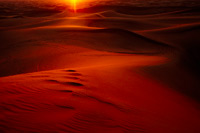
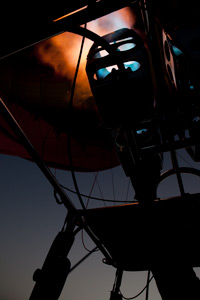
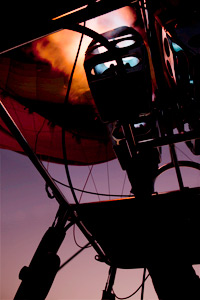
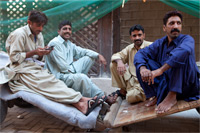
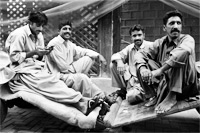
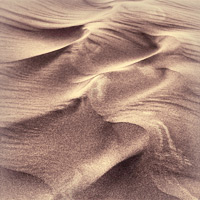
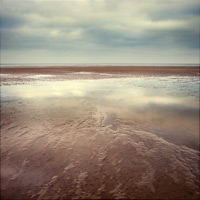
Mini-PSD #76 [uploaded on 4th July 2011]
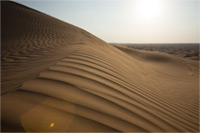
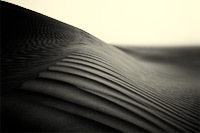
This image, shot in the desert near Dubai, was partially desaturated using the Channel Mixer, then adjusted using just three curves: one extremely steep S-curve to add a massive boost to the contrast, another masked curve to lighten the borders of the image, and a final curve to tone it.
View a larger version here >>>
|
|
|
|
|
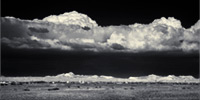
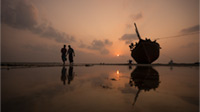
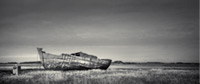
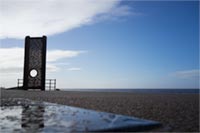
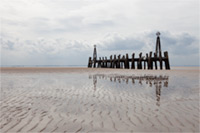
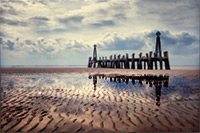
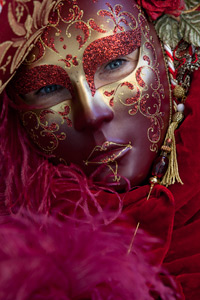
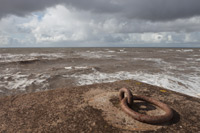
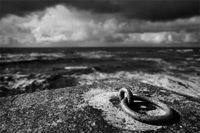
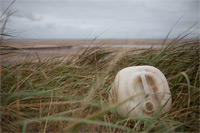
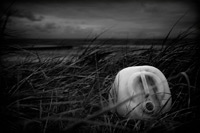
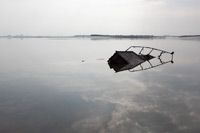
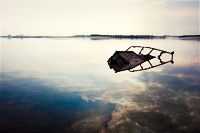
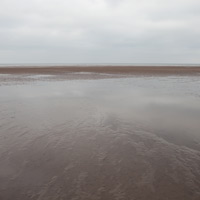
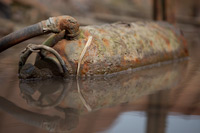
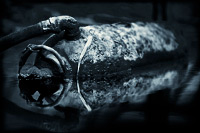
Mini-PSD #75 [uploaded on 27th June 2011]
This shot of a wrecked boat on the shore of the Wyre Estuary (UK) was adjusted using 12 adjustment layers, including 9 Curves adjustments, one Channel Mixer adjustment layer, and two Hue/Saturation adjustments.
View a larger version here >>>
|
|
|
|
|
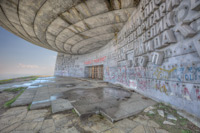
Mini-PSD #74 [uploaded on 20th June 2011]
This Mini-PSD illustrates the changes that were made to a tone mapped HDR image (constructed from a seven-shot bracketed sequence using Photomatix Pro.
View a larger version here >>>
|
|
|
|

|
Mini-PSD #72 [uploaded on 13th June 2011]
This image was converted to black and white using two channel mixer adjustment layers, the adjusted using six masked curves for contrast, one for a tone, and a final Hue/Saturation adjustment layer to fine-tune the saturation.
View a larger version here >>>
|
|
|
|
|
Mini-PSD #72 [uploaded on 6th June 2011]
This image was adjusted using just four adjustment layers: a black and white adjustment layer, to lighten her skin tone and eyes, and three curves, one to adjust the overall contrast, another to lighten the chair on the left of the image, and another to marginally lighten the eyelashes above her eyes.
View a larger version here >>>
|
|
|
|
|
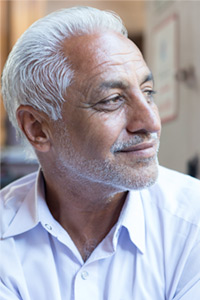
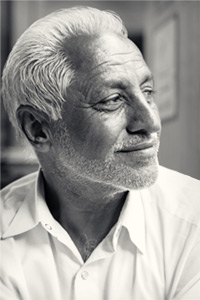
Mini-PSD #71 [uploaded on 30th May 2011]
This is a simple image, but an interesting one. It was adjusted using two curves (one global, and one to brighten his eyes), but was also altered using a Black and White adjustment layer to change the density of different colours within the image. Please note the blend mode of this layer, i.e. it's set to Luminosity, and as such has no effect on saturation.
View a larger version here >>>
|
|
|
|
|
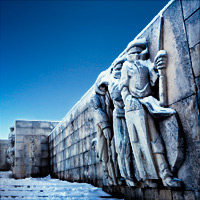
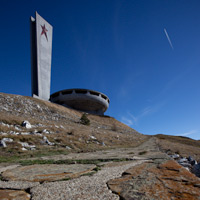
Mini-PSD #70 [uploaded on 23rd May 2011]
This image was created by blending three exposures: the -2EV exposure for the sky and the metered and +1EV exposures for the structure. The composite image was then modified using 10 adjustment layers to selectively alter contrast, tone and saturation in different areas of the image. I also used Topaz Detail to emphasise the fine scale detail.
View a larger version here >>>
|
|
|
|
|
Mini-PSD #69 [uploaded on 16th May 2011]
This image was adjusted using five Curves (four for contrast, one of tone) then the saturation was boosted using a Hue/Saturation adjustment layer. Additionally, I used Topaz Detail to bring out the fine scale detail in the glass.
View a larger version here >>>
|
|
|
|
|
Mini-PSD #68 [uploaded on 9th May 2011]
This image was converted to black and white using the channel mixer then adjusted using three curves: one to adjust global contrast and two to add a minor boost in contrast to different areas of his face. Additionally, I used Topaz Detail to bring out the fine scale detail in his face and hair.
View a larger version here >>>
|
|
|
|
|
Mini-PSD #67 [uploaded on 2nd May 2011]
This image was adjusted using two Black and White adjustment layers (to alter the tonal balance between the sky and foreground), six Curves adjustments, and one Hue/Saturation adjustment layer. Additionally, I've included a second set of adjustment layers (labelled 'original edit') that demonstrate an alternative way to process this image.
View a larger version here >>>
|
|
|
|
|
Mini-PSD #66 [uploaded on 25th Apr. 2011]
This portrait was converted to black and white using three blended adjustments (two channel mixer adjustments and a hue/saturation adjustment layer) and then contrast-adjusted using four curves: one to darken the left side of his face, one to adjust global contrast, and two to brighten his eyes.
View a larger version here >>>
|
|
|
|
|
Mini-PSD #65 [uploaded on 18th Apr. 2011]
This image was adjusted using three Curves for contrast but also utilised an image based layer set to multiply blend mode (to darken the image and increase the contrast) and a further image based layer (set to Color blend mode) to restore the original colours. Additionally, I used Topaz Detail to bring out some of the fine scale detail in his face.
View a larger version here >>>
|
|
|
|
|
Mini-PSD #64 [uploaded on 11th Apr. 2011]
This image was converted to black and white using a combination of the Hue/Saturation tool and Channel Mixer then adjusted using a further 15 Curves. Curves 1 provides a (mostly) global adjustment, Curves 15 tones the image, while Curves 2 through 14 make selective adjustments to different buildings and other small sections of the image - particularly in terms of increasing the contrast to cut through the atmospheric haze.
View a larger version here >>>
|
|
|
|
|
Mini-PSD #63 [uploaded on 4th Apr. 2011]
This image was first tone mapped using Photomatix Pro (to accentuate the fine scale detail) then adjusted in Photoshop using two channel mixer adjustment layers, to boost the saturation, and four curves to increase contrast (note the unusual shape of Curves 1).
View a larger version here >>>
|
|
|
|
|
Mini-PSD #62 [uploaded on 28th Mar. 2011]
This image was adjusted using just four curves: one to adjust the brightness and contrast of the foreground, another for the sky, and another to add a mild vignette. The fourth curve was used to tone the image.
View a larger version here >>>
|
|
|
|
|
Mini-PSD #61 [uploaded on 21st Mar. 2011]
This image was converted to black and white using the Channel Mixer then adjusted using seven masked curves (six for contrast, one for tone). Additionally, the fine scale detail was enhanced using Topaz Detail.
View a larger version here >>>
|
|
|
|
|
Mini-PSD #60 [uploaded on 7th Mar. 2011]
This image was adjusted using seven curves adjustments (for tone and contrast), and a combination of a Hue/Saturation adjustment layer and Channel Mixer adjustment layer to boost the saturation and tone the sky.
View a larger version here >>>
|
|
|
|
|
Mini-PSD #59 [uploaded on 28th Feb. 2011]
This image was created by merging two original exposures (one exposed for the sky, the other for the foreground). It was then converted to black and white using the channel mixer then adjusted using six curves (five for contrast, one for tone).
View a larger version here >>>
|
|
|
|
|
Mini-PSD #58 [uploaded on 21st Feb. 2011]
This image was adjusted using six masked curves (five for contrast, one for tone). The fine scale detail was also enhanced using Topaz Detail.
View a larger version here >>>
|
|
|
|
|
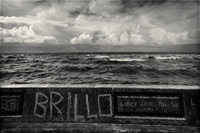
Mini-PSD #57 [uploaded on 13th Feb. 2011]
This image was adjusted using six masked curves (five for contrast, one for tone) and an additional Invert adjustment layer to partially invert the background colours.
View a larger version here >>>
|
|
|
|
|
Mini-PSD #56 [uploaded on 9th Feb. 2011]
This image was converted to black and white using the Channel Mixer, re-toned using a duplicate of the original image, and adjusted using a further six curves (one for tone, five for contrast).
View a larger version here >>>
|
|
|
|
|
Mini-PSD #55 [uploaded on 30th Jan. 2011]
This image was adjusted using three curves for contrast, a Channel Mixer adjustment layer to convert the image to black and white, and a final curve to add a warm tone to the image.
View a larger version here >>>
|
|
|
|

|
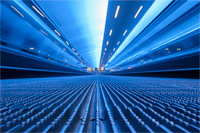
Mini-PSD #54 [uploaded on 24th Jan. 2011]
This image of a travelator at Manchester airport was shot using Tungsten white balance (hence the blue cast) and then adjusted using eight masked curves and a variety of content changes (including noise reduction, adding blur and transformation using the Warp tool).
View a larger version here >>>
|
|

|
|

|
Mini-PSD #53 [uploaded on 17th Jan. 2011]
This image was converted to black and white using a combination of the Hue/Saturation tool and Channel Mixer, then adjusted using one Curve for global contrast and a second, masked Curve to lighten the goat herder's face.
View a larger version here >>>
|
|
|
|
|
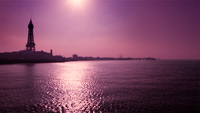
Mini-PSD #52 [uploaded on 10th Jan. 2011]
This shot of Blackpool Tower was adjusted using four curves (three for contrast, one of tone) and a Hue/Saturation adjustment layer to boost the saturation.
View a larger version here >>>
|
|
|
|
|
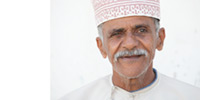
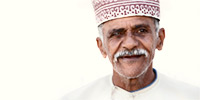
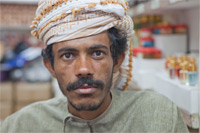
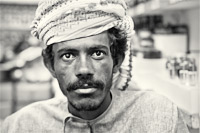
Mini-PSD #51 [uploaded on 3rd Jan. 2011]
This portrait, shot in the Muttrah Souq in Muscat (Oman), was converted to black and white using the Channel Mixer then adjusted using five curves: four for contrast, one for tone.
View a larger version here >>>
|
|
|
|
|
Mini-PSD #50 [uploaded on 27th Dec. 2010]
This rather dull flat original was adjusted using ten Curves adjustments (nine for contrast, one for tone), two Hue/Saturation adjustment layers and one Channel Mixer adjustment layer. Additionally, the local contrast of the foreground was increased using Topaz Detail.
View a larger version here >>>
|
|
|
|

|
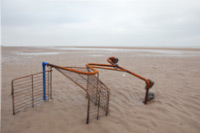
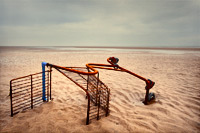
Mini-PSD #49 [uploaded on 20th Dec. 2010]
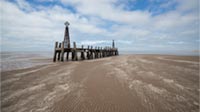
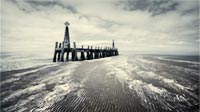
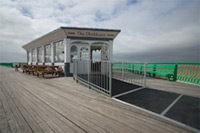
This image was adjusted using seven masked Curves to alter the contrast in different regions of the image, one Channel Mixer adjustment layer to lighten the sand in front of the pier, and a final Curves adjustment to tone the image.
View a larger version here >>>
|
|
|
|
|
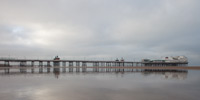
Mini-PSD #48 [uploaded on 13th Dec. 2010]
This rather dull, flat image was adjusted six curves: one to add a large increase in global contrast, the other five to selectively alter the contrast in specific areas.
View a larger version here >>>
|
|
|
|
|
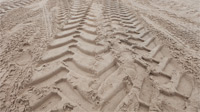
Mini-PSD #47 [uploaded on 8th Dec. 2010]
This image was converted to black and white using a combination of the Hue/Saturation tool and the Channel Mixer, adjusted for contrast using six masked curves, then toned using an additional curve.
View a larger version here >>>
|
|
|
|
|
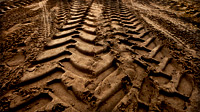
Mini-PSD #46 [uploaded on 29th Nov. 2010]
This image was adjusted using four Curves – three for contrast, one for tone – and a Hue/Saturation adjustment layer to add a minor boost to the saturation.
View a larger version here >>>
|
|
|
|

|
Mini-PSD #45 [uploaded on 22nd Nov. 2010]
This shot, taken at sunrise at Jabel Shams in Oman, was converted to black and white using the Channel Mixer and then modified using seven Curves adjustment layers. The image was then toned using a Selective Color adjustment layer and one further Curves layer.
View a larger version here >>>
|
|
|
|
|
Mini-PSD #44 [uploaded on 8th Nov. 2010]
This rather dull, flat original was transformed using 10 adjustment layers: seven Curves adjustments (six for contrast, one for tone); one Channel Mixer adjustment (to lighten the sand along the horizon); one Selective Color adjustment (again, to modify the sand along the horizon); and one Hue/Saturation adjustment layer to boost the overall saturation.
View a larger version here >>>
|
|
|
|
|
Mini-PSD #43 [uploaded on 31st Oct. 2010]
This image was converted to black and white using the channel mixer then adjusted using eight curves: seven for contrast, one for tone.
View a larger version here >>>
|
|
|
|
|
Mini-PSD #42 [uploaded on 25th Oct. 2010]
This image was desaturated using the channel mixer then adjusted using five curves: four for contrast, one for tone.
View a larger version here >>>
|
|
|
|
|
Mini-PSD #41 [uploaded on 18th Oct. 2010]
This image was converted to black and white using the channel mixer then adjusted using four curves: three for contrast, one for tone.
View a larger version here >>>
|
|
|
|
|
Mini-PSD #40 [uploaded on 11th Oct. 2010]
This image was adjusted using four masked Curves and a masked Hue/Saturation adjustment layer to add a minor saturation boost to the background.
View a larger version here >>>
|
|
|
|
|
Mini-PSD #39 [uploaded on 4th Oct. 2010]
This image was adjusted using four masked curves for contrast (one of which was an extremely steep curve to lift the foreground detail), and one to tone the image, while the black and white conversion was achieved using a combination of the Channel Mixer tool and the Hue/Saturation tool. I also used Topaz Detail to enhance the foreground detail.
View a larger version here >>>
|
|
|
|
|
Mini-PSD #38 [uploaded on 27th Sept. 2010]
This image was adjusted using three curves (for contrast) and a Selective Color adjustment layer to tone the image. Three image based layers were also used: to soften specific areas and add a soft-focus effect to the image as a whole.
View a larger version here >>>
|
|
|
|
|
Mini-PSD #37 [uploaded on 20th Sept. 2010]
This portrait was converted to black and white using the channel mixer and then the contrast was adjusted using five curves adjustments layers, three of which were masked.
View a larger version here >>>
|
|
|
|
|
Mini-PSD #36 [uploaded on 14th Sept. 2010]
This image was adjusted using two curves to increase the contrast (one global, one masked). The saturation boost was achieved using one Hue/Saturation adjustment and one Channel Mixer adjustment layer.
View a larger version here >>>
|
|
|
|
|
Mini-PSD #35 [uploaded on 6th Sept. 2010]
Despite the dramatic transformation, this image was adjusted using just two Curves: one for contrast, one for tone.
View a larger version here >>>
|
|
|
|
|
Mini-PSD #34 [uploaded on 30th August 2010]
This image was adjusted using five masked curves for tone and contrast. The selective desaturation was achieved by using a masked Hue/Saturation adjustment and the Channel Mixer.
View a larger version here >>>
|
|
|
|
|
Mini-PSD #33 [uploaded on 23rd August 2010]
This image was adjusted using five Curves layer, one Channel Mixer layer, and one Hue/Saturation layer. The toned desaturation was achieved by converting the image to black and white, adding a duplicate copy of the image layer (labelled 'layer 2', opacity: 28%, blend mode: color), and then adding a final Curve to add the warm magenta/yellow tone. I also used Bokeh to add some minor blur to the top-right corner of the image.
View a larger version here >>>
|
|
|
|
|
Mini-PSD #32 [uploaded on 16th August 2010]
This image was adjusted using eight Curves adjustments and one Hue/Saturation adjustment layer. Additionally, the rightmost edge of the image was stretched (to change the aspect ratio from 4x3 to 3x2) and I used Alien Skin's Bokeh plugin to blur the rightmost border and Topaz Detail to enhance the detail on the shirt.
View a larger version here >>>
|
|
|
|
|
Mini-PSD #31 [uploaded on 9th August 2010]
This image was adjusted using one Channel Mixer adjustment layer (to partially desaturate the image) and seven Curves adjustment (six for selective contrast enhancement, one for tone). Additionally, I used Alien Skin's Bokeh plugin to blur the hair around her face.
View a larger version here >>>
|
|
|
|
|
Mini-PSD #30 [uploaded on 2nd August 2010]
This image was adjusted using five Curves and five Hue/Saturation adjustment layers.
View a larger version here >>>
|
|
|
|
|
Mini-PSD #29 [uploaded on 26th July 2010]
This image was adjusted using a Channel Mixer adjustment layer (to convert the image to black and white), six masked curves (for contrast), and a final curves adjustment layer to tone the image.
View a larger version here >>>
|
|
|
|

|
Mini-PSD #28 [uploaded on 19th July 2010]
This image was adjusted using seven masked curves and two Channel Mixer adjustment layers. Additionally, the fine scale detail was enhanced using Topaz Detail.
View a larger version here >>>
|
|
|
|
|
Mini-PSD #27 [uploaded on 12th July 2010]
This image was using seven curves (six for contrast, one for tone) and two channel mixer layers. My main aim, other than adding some much needed contrast, was to tone the image to provide a greater contrast between my daughter and the background.
View a larger version here >>>
|
|
|
|
|
Mini-PSD #26 [uploaded on 5th July 2010]
This image was adjusted using four image based layers (to adjust the background, skin tones, and highlight softening) and five adjustment layers: three masked curves, one Hue/Saturation adjustment layer, and one Vibrance adjustment layer. The changes are all relatively subtle but the final image is greatly improved.
View a larger version here >>>
|
|

|
|
|
Mini-PSD #25 [uploaded on 28th June 2010]
This image was adjusted in variety of ways including extending the canvas and using two different conversions of the same RAW file (one for the majority of the image, another for his eyes). The subsequent image was then adjusted using a further nine adjustment layers.
View a larger version here >>>
|
|
|
|
|
Mini-PSD #24 [uploaded on 14th June 2010]
This image was adjusted using three masked Curves, one of which utilised the techniques discussed in Luminosity masking: part one to selectively brighten the highlight detail in the clouds.
View a larger version here >>>
|
|
|
|
|
Mini-PSD #23 [uploaded on 14th June 2010]
This image was adjusted using five Curves adjustments, one Selective Color adjustment layer, and one Channel Mixer adjustment.
View a larger version here >>>
|
|
|
|
|
Mini-PSD #22 [uploaded on 7th June 2010]
This Mini-PSD illustrates the changes that were made to a tone mapped HDR image (constructed from a seven-shot bracketed sequence using Photomatix Pro.
View a larger version here >>>
|
|
|
|
|
Mini-PSD #21 [uploaded on 31st May 2010]
This image was converted to black and white using the channel mixer, then adjusted for contrast using three curves. Additionally, Imagenomic's Portraiture plugin was used to smooth the skin tones on an additional image layer.
View a larger version here >>>
|
|
|
|
|
Mini-PSD #20 [uploaded on 24th May 2010]
Following some minor changes to its content this image was adjusted using three curves, one hue/saturation adjustment layer, and a channel mixer adjustment. Although each of the changes were straightforward, their combined effect is both effective and dramatic.
View a larger version here >>>
|
|

|
|
|
Mini-PSD #19 [uploaded on 17th May 2010]
This image was adjusted using five curves (four for contrast, one for tone), and two channel mixer adjustments, both of which were used to partially desaturate the original image.
View a larger version here >>>
|
|
|
|
|
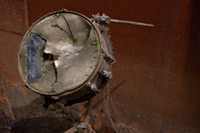
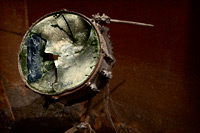
Mini-PSD #18 [uploaded on 10th May 2010]
This image was adjusted using four curves and a Hue/Saturation adjustment layer. In addition, Topaz Detail was used to enhance the fine scale detail on the broken skin of the drum.
View a larger version here >>>
|
|
|
|
|
Mini-PSD #17 [uploaded on 3rd May 2010]
This image was created using two different ‘exposures’, both of which were produced from the same RAW file. It was then adjusted using eight curves adjustment layers and two channel mixer layers.
View a larger version here >>>
|
|
|
|
|
Mini-PSD #16 [uploaded on 26th Apr 2010]
After some initial modification of content (which included blurring both the edges of the image, and the brightest highlights), this image was adjusted using three curves and two channel mixer adjustment layers.
View a larger version here >>>
|
|
|
|
|
Mini-PSD #15 [uploaded on 19th Apr 2010]
After some initial modification of content, this image was adjusted using six masked curves and a channel mixer adjustment layer (used to partially desaturate the image).
View a larger version here >>>
|
|
|
|
|
Mini-PSD #14 [uploaded on 12th Apr 2010]
This Mini-PSD illustrates the changes that were made to a tone mapped HDR image (constructed from a three-shot bracketed sequence using Photomatix Pro). The metered exposure is also included within the PSD file.
View a larger version here >>>
|
|
|
|
|
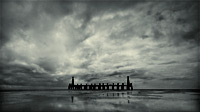
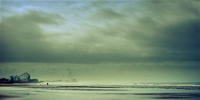
Mini-PSD #13 [uploaded on 5th Apr 2010]
This shot of the Fleetwood shoreline is probably the most complex Mini-PSD we have posted to date: four additional image based layers and ten Curves adjustments.
View a larger version here >>>
|
|
|
|
|
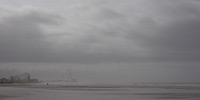
Mini-PSD #12 [uploaded on 29th Mar 2010]
This image of Fleetwood beach, on the North West coast of the UK, was adjusted using four Curves and two Channel Mixer adjustments.
View a larger version here >>>
|
|
|
|
|
Mini-PSD #11 [uploaded on 22nd Mar 2010]
This dull flat original was cropped, rotated, then transformed using just three Curves: two for contrast, one for tone.
There's a detailed walk-through of this image here.
View a larger version here >>>
|
|
|
|
|
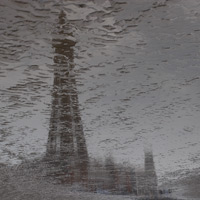
Mini-PSD #10 [uploaded on 15th Mar 2010]
In addition to a large increase in both contrast and saturation (Curves, Channel Mixer, and Hue/Saturation) the most significant change that was made to this image was the flip in orientation: transforming this dull, flat shot of a puddle into an image with considerably more impact.
View a larger version here >>>
|
|
|
|
|
Mini-PSD #9 [uploaded on 8th Mar 2010]
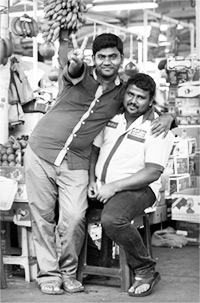
This image – a shot of an old bicycle in the Spice Souk, Dubai – was adjusted using: seven masked curves (six for contrast, one for colour); two channel mixer adjustment layers; and one hue/saturation adjustment layer. Some minor modifications were also made to the background areas of the image.
View a larger version here >>>
|
|
|
|
|
Mini-PSD #8 [uploaded on 1st Mar 2010]
This image was adjusted in Lab Color mode, using one image modification layer and six curves: five to selectively alter the contrast in different areas of the image, and one to dramatically alter the colour balance.
View a larger version here >>>
|
|

|
|
|
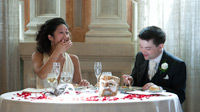
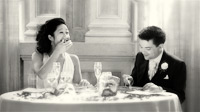
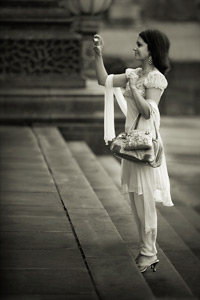
Mini-PSD #7 [uploaded on 22nd Feb 2010]
This was an opportunistic capture of a guest at a wedding, and was post-processed using two Channel Mixer adjustment layers (to convert the image to black and white) and six Curves adjustments: selectively applied to alter the contrast and tone of the black and white conversion.
View a larger version here >>>
|
|
|
|
|
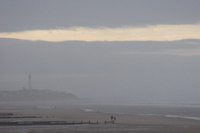
Mini-PSD #6 [uploaded on 15th Feb 2010]
This image was post-produced in Lab Color mode using four curves to adjust both the tonal balance and colour balance of different areas of the image. Additionally, the two figures were moved from the middle of the image towards the right-hand edge: correcting the compositional imbalance of the original shot.
View a larger version here >>>
|
|
|
|
|
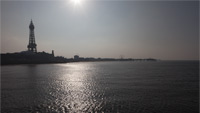
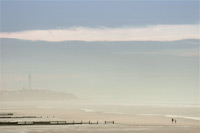
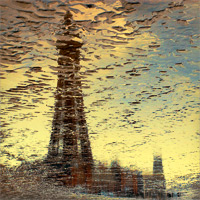
Mini-PSD #5 [uploaded on 8th Feb 2010]
This reflection of Blackpool Tower, taken on Blackpool beach in the UK, started out as a rather grey, flat original. With a large increase in both contrast and saturation though, I was able to produce a much more striking image. It was adjusted using six Curves adjustment layers, one Channel Mixer layer, one Selective Color adjustment, and one Hue/Saturation adjustment.
View a larger version here >>>
|
|
|
|
|
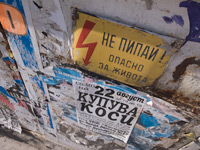
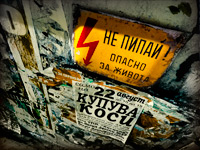
Mini-PSD #4 [uploaded on 6th Feb 2010]
The rather dull original was transformed using a variety of adjustment layers including six Curves adjustment layers (for tone and contrast), one Hue/Saturation adjustment layer, a Selective Color adjustment, and two image based layers.
View a larger version here >>>
|
|
|
|
|
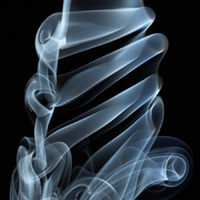
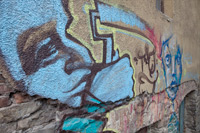
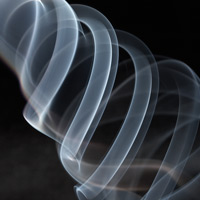
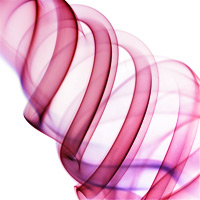
Mini-PSD #3 [uploaded on 6th Feb 2010]
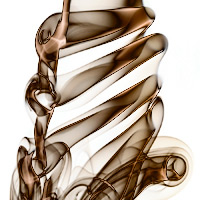
This smoke shot was transformed using five Curves adjustment layers (to alter contrast and tone), one Hue/Saturation adjustment, two image based layers, and an Invert adjustment layer.
View a larger version here >>>
|
|
|
|
|
Mini-PSD #2 [uploaded on 6th Feb 2010]
This image was constructed using twelve layers: seven Curves adjustment layers; two additional image layers; one Invert adjustment (set to Color blend mode); one Selective Color layer; and one Vibrance adjustment.
View a larger version here >>>
|
|
|
|
|
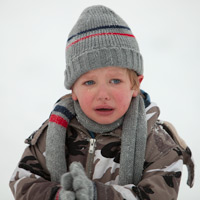
Mini-PSD #1 [uploaded on 6th Feb 2010]
This was a relatively straightforward image to produce, created using six adjustment layers: an additional image layer, modified by Topaz Detail to enhance local contrast; a Channel Mixer layer to partially desaturate the image; and four Curves adjustment layers.
View a larger version here >>>
|