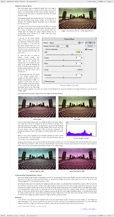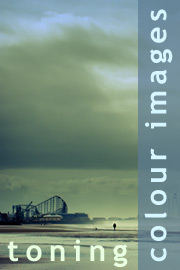
Toning colour imagesA key function of any digital camera is its capacity to produce images with colours that match or closely resemble those of the original scene and, generally speaking, most do a good job. There are exceptions – e.g. when the camera’s automatic white balance gets things wrong – but most of the time you can be fairly confident that what you see is a reasonably faithful ‘copy’ of the original scene. From a technical point of view, this is a good thing, but aesthetically it’s a little more complicated, not least because digital images can appear quite sterile. In this tutorial we will explore these aesthetic limitations in a bit more detail before moving on to discuss a variety of tools and techniques you can employ to tone your colour images. This will include a discussion of the Channel Mixer, the Selective Color tool and the Curves tool. We will also discuss the merits of selectively toning specific areas of an image to increase their overall impact. The topics covered in this tutorial include:
By the end of this tutorial you will be able to:
This tutorial contains 5420 words, 59 illustrative images and screen grabs, and has received 27 comments. Photoshop files included with this tutorial
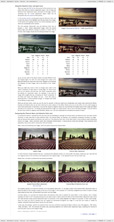
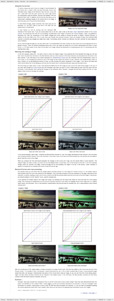
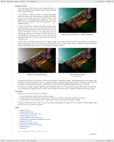
Each of our tutorials is based around a series of Photoshop files, at the resolution originally posted on chromasia, and each contains all the original adjustment layers I used to create the final image. The ones that are included in this tutorial, and a brief description of how each one will be used, are listed below – the ‘before’ version on the left, the ‘after’ version on the right. Each of these files can be downloaded after you subscribe.
What our subscribers have said about this tutorial
Content overview (the rollover graphics and embedded videos are not illustrated)
How to subscribe
Further information
To find out more about our other individual tutorials please click any of the following images. Alternatively, you can visit our main tutorials page for further information on: our annual subscriptions; our forthcoming issues; and our current members’s offers. You can also read through our sample tutorial on Tonal Range and the Curves tool.
David J. Nightingale © 2003–18 • all rights reserved
|
↓ David
↓ Libby
↓ Get the Latest News


software links
 Our annual subscribers and lifetime members can obtain a 15% discount on any of the Topaz Labs Photoshop plugins or plugin bundles.
 Our annual subscribers and lifetime members can obtain a 15% discount on Photomatix Pro.
training partners   Included above are links to a number of our training partners that we unreservedly recommend.
| ||||||||||||||||||||||||||||||||||||||||||||||||||||||||||||||||||||||||||||||||||||||||||||||||||||||||||||||||||||||||||||||||||||||||||||||||||||||||||||||||||||||||||||||||||||||||||