Learn how these images were created in our current tutorials
Important Notice
Please note: due to recent changes to VAT charges and digital downloads our tutorials are no longer available to new subscribers.
An introduction to our tutorials
Welcome to our online photography and post-production tutorials for photographers. Here you will find extensive written and video tutorials, video critiques, and Mini-PSDs, all written and presented by internationally renowned photographer, author and educator, David J. Nightingale.
Our tutorials and other resources cover a broad range of topics – from how to optimise your initial exposures, through converting your RAW files, to how transform your photographs into powerful and compelling images during post-production – and the majority of our tutorials include a set of downloadable Photoshop files that contain all the adjustment layers that were used to transform the original image.
The tutorials are designed to be accessible, to both novice and experienced users. The only prior knowledge you need is some understanding of the Curves tool – one of Photoshop's most useful and powerful tools. We provide a detailed explanation of this tool in our FREE introductory tutorial on Tonal Range and the Curves tool.
CONTACT US
If you have any questions about any of the information on this page, or would like to ask us anything else about our tutorials or training, please email us using this link:
PRICING
If you’re unsure of how much a subscription will cost in your local currency please visit xe.com’s Universal Currency Converter before purchasing.
AFFILIATE PROGRAMME
By purchasing our tutorials you will be able to join our affiliate programme and earn 25% of all sales of an annual subscription made via an affiliate link or banner.
Tonal range and the Curves tool • 81 comments
In this Photoshop tutorial I show you how to get the most out of the Curves tool, one of Photoshop’s most powerful features. This tool can dramatically enhance the contrast of an otherwise dull image; it can change the colour balance, either subtly or more radically; it can increase the saturation; and it can even covert an image to black and white (when used with LAB color mode). In short, it’s an extremely powerful tool with a wide range of applications; but it’s also quite difficult to understand, at least at first. In this Photoshop tutorial I will show you a number of ways you can use this tool using a range of practical examples.
If you decide that you would like to subscribe to our Photoshop tutorials, details of how to sign up are included below. As soon as you sign up you will gain automatic access to all our published tutorials, any new material we add during the lifetime of your membership, and a range of further member's offers (details below).
Our most recent tutorials
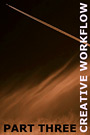
Creative Workflow: part seven • 14 comments
In this tutorial we will be taking a detailed look at the various aesthetic and technical decisions that informed the creation of this image. As with all the tutorials in this series the emphasis is upon why the changes were made, not just how they were achieved.
duration: 27m 9s video size: 1280px by 800px file size: 257.1MB
Critique slot screencasts
Our Critique Slot Screencasts provide our members with an exciting opportunity to:
Get detailed and constructive feedback on one of their own images.
Gain an insight into how other members postprocess their images.
See how I might have processed that particular image.
In the first section of each video we look at the various changes that were made to the supplied image, and talk through both the technical and aesthetic merit of each change. In the second part I either rework these changes or reprocess the image from the original RAW file to produce a new version. In addition to the QuickTime video you will also be able to download my version of the image, the original PSD file (both at a resolution of around 1000px wide) and the photographer's notes for each image.
I should also mention that my versions are recorded live, hopefully in one take! I work through the image from start to finish rather than just explaining a set of pre-existing adjustment layers.
Mini-PSDs • 33 comments
February 2010 saw the introduction of a new feature: “mini-PSDs”. One of the things our subscribers have said that they find most useful are the layered PSD files that we include with each image-based tutorial. As such we’re now releasing an additional low res’ PSD file EVERY WEEK. Each image is between 800px and 1000px wide: selected from those that have previously been published on chromasia. They are provided ‘as is’ – just the file, with little or no explanatory text – but will help you work out how each image was constructed.
Creative Workflow: part six • 10 comments
In this tutorial we will be taking a detailed look at the various aesthetic and technical decisions that informed the creation of this toned black and white image. As with all the tutorials in this series the emphasis is upon why the changes were made, not just how they were achieved.
duration: 50m 38s video size: 1280px by 800px file size: 784MB
Creative Workflow: part five • 12 comments
As with our other tutorials in this series, Creative workflow #5 takes the creative process as its primary focus; i.e. rather than just discussing 'how' an image was constructed, we will also be considering 'why' each change was made, and how each change contributes to the image as a whole.
duration: 40m 16s video size: 1280px by 800px file size: 427MB
Black and White: part two • 30 comments
In this, the first of our technique based video tutorials, we take a detailed look at four techniques you can use to convert an image to black and white: the Hue/Saturation tool; the Channel Mixer; the Black and White tool; and how to convert your images to black and white during the RAW conversion process. In the first section we discuss the limitations of the Hue/Saturation tool before moving on to a detailed discussion of how the Channel Mixer technique can be used to radically adjust both the tonal range and tonal balance of a black and white image. In the third section we take a detailed look at the Black and White tool (introduced in CS3), which provides an ever greater degree of fine scale control over the conversion process, but we also discuss an alternative way of working the Hue/Saturation tool (to emulate the functionality of the Black and White tool). In the final section we move on to discuss how to convert your images to black and white during the RAW conversion process.
In each section we discuss the strengths and weakness of each technique (from both a technical and aesthetic point of view) by reference to four example images, each of which can each be downloaded from the members area.
duration: 1h 3m 42s video size: 1280px by 800px file size: 771MB
Luminosity masking: part two • 5 comments
This is the second of a two part series of tutorials on luminosity masking, a powerful technique that you can use to selectively enhance your images. Unlike conventional masking techniques, which often require you to manually create a specific selection to mask an area of an image (and then feather, or otherwise alter the mask to blend the change with the remainder of the image), luminosity masking creates selections and masks that based solely on the brightness of the pixels themselves. As such, masks created using this technique often blend seamlessly with one another and the unchanged areas of the image, obviating the need to predetermine the selection area, or repair/refine the mask subsequent to its use.
In this part of the series we will focus on luminosity painting: a technique that provides an even greater degree of fine scale control over the tonal balance of different areas of your images.
Both parts were co-written with Tony Kuyper, a recognised authority in this field.
Luminosity masking: part one • 15 comments
This is the first of a two part series of tutorials on luminosity masking, a powerful technique that you can use to selectively enhance your images. Unlike conventional masking techniques, which often require you to manually create a specific selection to mask an area of an image (and then feather, or otherwise alter the mask to blend the change with the remainder of the image), luminosity masking creates selections and masks that based solely on the brightness of the pixels themselves. As such, masks created using this technique often blend seamlessly with one another and the unchanged areas of the image, obviating the need to predetermine the selection area, or repair/refine the mask subsequent to its use.
Both parts were co-written with Tony Kuyper, a recognised authority in this field.
Creative workflow #4 • 6 comments
As with our other tutorials in this series, Creative workflow #4 takes the creative process as its primary focus; i.e. rather than just discussing ‘how’ an image was constructed, we will also be considering ‘why’ each change was made, and how each change contributes to the image as a whole.
Photoshop for winter photography • 10 comments
This tutorial is based on a suggestion by Paul Schroder, one of our lifetime members, on how best to shoot and post-process winter landscapes or other shots containing snow. The major topics covered include: optimising your initial exposures; enhancing the colour of images shot of dull, flat days; how to tone black and white versions of your images; how to produce high-key winter portraits; and how to retain and enhance the fine scale detail in snow scenes.
Digital workflow: part five • 7 comments
In this tutorial we will discuss a variety of alternative RAW processors, illustrating their strengths and weaknesses in comparison to Adobe Camera RAW. This will include a discussion of Capture One Pro, DXO Optics Pro, and RAW Developer.
Creative workflow #3 • 11 comments
In this tutorial, the third in our Creative workflow series, we will be taking a detailed look at two versions of a single image: one in colour, one in black and white. In both cases though, in addition to working through the technical changes that were made, we will be taking a detailed look at the aesthetic and creative decision making that informed them.
Portraits: part two • 6 comments
In this tutorial we will be taking a detailed look at how to post-produce both high-key and low-key portraits from otherwise ordinary photographs. The topics covered will include: how to shoot and optimise the initial exposures, how to repair an otherwise imperfect background (in terms of lightening the background for high-key portraits, and darkening it for low-key shots), how and when to mask different areas of the images, and how to creatively recompose an image by extending the canvas.
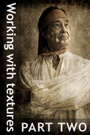
Working with textures: part two • 8 comments
In this, the second part of our series on working with textures, we will continue our discussion of Michael Regnier’s work. In this instance though, in addition to discussing the techniques that are necessary to produce such images, we will also be taking a detailed look at the creative and aesthetic processes that underpin their creation.
Creative workflow #2 • 5 comments
This is the second in our series of tutorials that take the creative process as their primary focus; i.e. rather than simply discussing ‘how’ an image was constructed, we will also be considering ‘why’ each change was made, and how it contributes to the image as a whole. As with our other image-based tutorials, we also include a thorough technical discussion of any tools or techniques that were employed, but the emphasis is upon the creative rather than technical outcomes.
High Dynamic Range images: part three • 6 comments
In this, the third part of our series on High Dynamic Range images, we will discuss how to use High Dynamic Range software to generate a pseudo-HDR image from a single original. We will then investigate how to tone map this image using Photomatix Pro. In addition we will also discuss how to use Camera RAW (or other RAW processing software) to optimise your initial image prior to generating the pseudo-HDR image, how to minimise and remove noise from a tone mapped image, and how and when to blend an HDR image with a normal exposure.
Annual subscribers can obtain a 15% discount coupon code which can be used to purchase Photomatix Pro.
Working with textures: part one • 17 comments
This is the first of a two-part tutorial on working with textures; i.e. adding layers of texture to existing images. Unlike our previous, sole-authored tutorials, this short series was prepared in conjunction with Michael Regnier, an internationally renowned artist in this field. Michael has produced work for a variety of clients, including Coca Cola, Kodak and the Federal Reserve Bank, and has been awarded numerous accolades for his work.
If you would like to see some examples of Michael’s work, you can do so here:
Digital workflow: part four • 6 comments
In this tutorial we will continue our discussion one of the most important aspects of an effective digital workflow – how to convert your RAW files to optimize the quality of your final images. This is based around a detailed discussion of Adobe Camera Raw (Photoshop’s built-in RAW converter) and includes: using the Tone Curve, sharpening, noise reduction, using the HSL/Grayscale tool, split toning, removing chromatic aberration, adding and removing vignettes, and using graduated filters (introduced with Photoshop CS4).
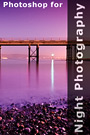
Photoshop for night photography • 16 comments
In many ways the post-production skills you need to process low light or night shots are no different to those you would use for images taken during daylight hours, but there are a number of technical and aesthetic issues that become more salient when processing this type of image. These include: visualising the final image, altering the white balance – either to compensate for sodium light pollution (common in many night shots, particularly in urban environments) or to creatively manipulate an image – and merging multiple exposures to control for point light sources.
In addition this tutorial also discusses a range of technical considerations relevant to shooting at night. These include: focussing (a non-trivial task when shooting in the dark), setting ISO, determining the correct exposure, and noise reduction.
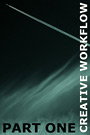
Creative workflow #1 • 15 comments
This is the first in a new series of tutorials that take the creative process as their primary focus; i.e. rather than just discussing ‘how’ an image was constructed, we will also be considering ‘why’ each change was made, and how each change contributes to the image as a whole. As with our other image-based tutorials, each will also include a thorough technical discussion of any tools or techniques that were employed, but the emphasis will be upon creative rather than technical outcomes – e.g. how each image was constructed to tell a particular story, what each image says about its subject, and so on.
Digital workflow: part three • 12 comments
In this tutorial we begin our discussion of one of the most important aspects of an effective digital workflow – how to convert your RAW files to optimize the quality of your final images. This is based around a detailed discussion of Adobe Camera Raw (Photoshop’s built-in RAW converter) and includes: setting the white balance, recovering shadow details, recovering highlight detail, altering the exposure, increasing saturation and vibrance, and increasing clarity.
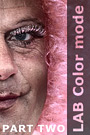
LAB Color mode: part two • 15 comments
In this tutorial we take a detailed look at how to manipulate colour using LAB Color mode. Specifically, we will discuss: the relationship between colours and their numeric values in LAB Color mode; how to alter a specific colour range within an image (a topic we briefly discussed in the An Introduction to LAB Color mode tutorial); how to alter a single colour within an image; how to colour correct an image in LAB Color mode; and how to tone the neutral areas of an image by manipulating the ‘a’ and ‘b’ Curves.
The specific topics covered include how to:
Alter a colour range of an image by manipulating the ‘a’ and ‘b’ Curves.
Alter a specific colour within an image.
Colour correct or alter the white balance of an image.
High Dynamic Range images: part two • 9 comments
This is the second part of a multi-part tutorial on creating High Dynamic Range images using Photoshop and Photomatix Pro. In this part we take a detailed look at how you can use Photomatix Pro to create and tone map your images, using both the Tone Compressor and Details Enhancer methods. The bulk of this tutorial is taken up with working through the various settings you need to adjust to produce your tone mapped images, but we also include two example images, both of which were produced using the Details Enhancer method.
The specific topics covered include:
Shooting for HDR.
Creating HDR images with Photomatix Pro.
Tone mapping: an introduction.
Photomatix Pro: tone mapping using the tone compressor.
Photomatix Pro: tone mapping using the details enhancer.
Annual subscribers can obtain a 15% discount coupon code which can be used to purchase Photomatix Pro.
Digital workflow: part two • 11 comments
This is the second section of a multi-part tutorial devoted to digital workflow which, over the coming months, will build into a comprehensive resource detailing a variety of topics: from capture to output to storage.
In this section we cover three main topics. First, we discuss choosing a workflow model; i.e. whether to use a range of stand-alone packages or an integrated solution such Aperture or Lightroom. Second, we briefly discuss importing, categorising and organising your images. Third, we cover a variety of techniques you can use to help you decide which of your images to work with, and which to delete.
High Dynamic Range images: part one • 13 comments
One of the first things we learn as photographers is that our camera sees the world in a different way to us, especially in terms of its ability to capture the full tonal range of a scene. For example, we know that if we want to take a backlit portrait we will most likely need to overexpose the shot or risk our subject’s face being lost in shadow. We also know that this will blow out the highlight details in the background. Likewise, if we wish to photograph the same subject against the backdrop of a glorious sunset, we will probably need to reconcile ourselves to the subject appearing as nothing more than a silhouette.
In short, we learn that our camera has limitations and that it can’s always capture the scene as we see it. So, we stop trying to take impossible shots, and concentrate instead on doing the best job we can with equipment whose limitations we have learnt to accommodate.
In this tutorial we will discuss a variety of techniques your can employ to circumvent the limitations of your equipment and produce those ‘impossible’ shots.
Please note that the ‘Merge to HDR’ command, discussed in this tutorial, is only available in Photoshop version CS2 and above.
Annual subscribers can obtain a 15% discount coupon code which can be used to purchase Photomatix Pro.
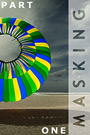
Masking: part one • 22 comments
In this tutorial we will discuss a variety of masking techniques including: creating complex and compound masks; repairing images with less than ideal masks; and how to add a vignette using a feathered mask.
Digital workflow: part one • 29 comments
In part one of this series we concentrate on two interrelated topics, both of which will provide you with the knowledge you need to maximise the quality of your initial images. First, we discuss the benefits of shooting RAW images rather than in-camera JPEGs. The topics covered in this section of the tutorial include: colour conversion; setting white balance and colour temperature; initial sharpening, the application of tone curves during RAW conversion, adding contrast and saturation, the importance of bit-depth, why you should avoid JPEG compression, and the benefits of preserving your latent images, i.e. your original RAW data. Second, we discuss two issues relating to optimising your initial exposures: i.e. avoiding the loss of data through overexposing an image; and how to ensure that your exposures capture the maximum amount of data.
An introduction to Lab Color Mode • 40 comments
Lab Color Mode (LAB) is an alternative colorspace that enables you to manipulate the luminosity and colour of your images more flexibly and powerfully than when working within RGB. In this, my first LAB tutorial, I hope to achieve three things. First, I will provide a brief explanation of the theory and numbers behind LAB (and how to work with these within Photoshop). Second, I will demonstrate the advantages of LAB over RGB – i.e. its ability to dramatically alter colour – both in terms of tone and saturation – more flexibly and with less degradation to your images than when using RGB. Third, using a range of real world examples, I will show you how to use LAB to:
dramatically alter the contrast of an image without affecting its colour balance or saturation.
increase the saturation of an image with less image noise and cleaner colour separation than when working in RGB.
alter the tone and colour balance of your images by adjusting the ‘a’ and ‘b’ channels within LAB.
invert specific colours and colour ranges using the Curves tool within LAB.
Portraits: part one • 26 comments
There are many techniques that you can use to enhance your portraits, but in this Photoshop tutorial I will be focussing on three things. The first is a general point about post-processing portraits – i.e. what it is you want your portrait to say – and the remaining two are techniques that I find especially useful in my own work:
Soft-focus effects, and …
Selective masking of a subject’s eyes.
Both of these techniques can transform a mundane portrait into something much more powerful …
Toning colour images • 27 comments
A key function of any digital camera is its capacity to produce images with colours that match or closely resemble those of the original scene and, generally speaking, most do a good job. There are exceptions – e.g. when the camera’s automatic white balance gets things wrong – but most of the time you can be fairly confident that what you see is a reasonably faithful ‘copy’ of the original scene. From a technical point of view, this is a good thing, but aesthetically it’s a little more complicated, not least because digital images can appear quite sterile.
In this Photoshop tutorial we will explore these aesthetic limitations in a bit more detail before moving on to discuss a variety of tools and techniques you can employ to tone your colour images. This will include a discussion of the Channel Mixer, the Selective Color tool and the Curves tool. We will also discuss the merits of selectively toning specific areas of an image to increase their overall impact …
Black and white: part one • 17 comments
With the advent of digital cameras, black and white photography has changed. Now, rather than loading a black and white film into your camera, you can either select to shoot in black and white mode (if your camera has one) or convert the image to black and white during post-production. There are a variety of ways of doing this within Photoshop, the simplest of which are the Desaturate command and the Hue/Saturation tool. Both of these methods convert an image to black and white based on an average of the RGB values of the individual pixels, and both often produce only average results.
In this Photoshop tutorial we will be discussing three further methods of creating black and white images. The first uses the Channel Mixer tool, which offers a much greater degree of control over the appearance of the final image, and the second – using Lab Color mode and the Lightness channel – is a great technique for producing black and white portraits. We will conclude the tutorial with a brief discussion of the new ‘Black and White’ tool, introduced with Photoshop CS3 …
Landscapes: creating dramatic skies • 44 comments
In one sense, creating a dramatic sky, assuming that the sky in your photograph isn’t entirely flat and lifeless to begin with, is relatively straightforward: you just need to expand its tonal range, boost the saturation, and so on. A relatively simple job for the Curves tool. Typically though, any shot that includes the sky will also include some other feature – the ground, a person, a tree, and so on – and invariably, the sky will be considerably brighter than this feature. If we simply adjust the image to make the sky more dramatic we will probably fail to produce a good image, and fail quite miserably. In this sense then, creating a dramatic sky must be seen as part of a larger task; i.e. creating an image with a dramatic sky, where both the sky the ground, or any other features, combine to create a well-crafted and compelling image …
Two free license keys for Noise Ninja (presented to two of the first 100 people who purchased an annual subscription or lifetime membership). These were won by Ellen Argilla and György Fleischmann.
About us
Chromasia Training limited is a sister company to Chromasia Limited (a fine arts and commercial photographic company run by David and Libby Nightingale) and specialises in all aspects of photographic training and post-production.
David formerly worked as a senior lecturer in a UK university but is now a full-time Director of the company. They live in Blackpool, a seaside resort in the North West of England, and have six children at home, all of whom have appeared regularly in their children’s portraiture gallery.
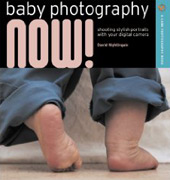
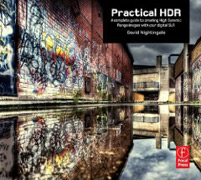
David has also written three books: Baby Photography Now (published by The Ilex Press in the UK and Lark Books in the US); Practical HDR, which was published by The Ilex Press in the UK and Focal Press in the US; and Extreme Exposure which was published by The Ilex Press in the UK and Amphoto in the US in the second quarter of 2010.
His work has been featured in numerous national and international magazines and websites, and his blog has won a variety of awards. These include:
Further information about the blog can be seen here.
Registered address • Chromasia Training Limited, 17 Victoria Road East, Thornton Cleveleys, Lancashire FY5 5HT, UK
Chromasia Training limited is registered in Cardiff • No 6513880
You can now subscribe to the tutorials news feed, which will be updated each time we release a new tutorial, by using either the AddThis button to the left or the following url:
You make it all seem so easy David and the clear step by step process really helps to explain how it's the incremental little, basic changes, make all the difference in the final complete image. Great as always.
Justin
A crystal-clear tutorial for a novice like me.Thank you very much.
Kevin
Very well presented. I consider myself an advanced Photoshop user, and there is information here I will find useful. The ability to download and view the layered files is crucial – the difference between the original and end result in Image 4 is staggering.
Absolutely superb tutorial David, well set out and very easy to follow. I've learnt such a tremendous amount already and am really looking forward to the others.
Roger
This is an excellent tutorial. I am by no means a neophyte when it comes to using Photoshop to process my images, but I had always wondered about the toning effects I have seen on Chromasia. There are some techniques here that I really hadn't used or seen tutorials for, so this was definitely worthwhile!
It is a rare treat that a photographer that produces such outstanding pieces of art, would also be able to produce such a wonderfully presented and explained tutorial. I've been a photographer for years, but have never really used Photoshop. As with any tutorial, if you are already in the knowledge about the subject then it is bound to seem too simple - but for me, to be able to see your examples of turning a "normal" photo into another Chromasia photo is magic.
This has been worth waiting for. Like many people, I can follow the step by step process with sample pictures and understand the techniques involved. I then open one of my own and wonder what I should do first, adding curves and other layers at random without really understanding what I want to achieve. I've often looked at David's original and final pictures and thought "How did he visualise it ending up like that?" With this tutorial you've got me thinking a different way – towards an end result rather than a series of random adjustments.
Steve
Another superb tutorial David, clear, concise and perfectly described. Definitely one of the best ever on HDR and Photomatix.
Rog
Awesome tutorial Dave. My lifetime subscription is already looking like pretty good value!
These have been truly a joy to go through. I especially appreciate that you reinforce the concepts as you go along. Thanks for being a good steward of your gifts.
brooks
In this, your third (2nd subscription) tutorial, I very much enjoy 'getting inside your head'. Reading about the process of discovery, the trial and error, and of course a down to Earth description of the different Photoshop tools, has helped me in ways no other book or tutorial has.
Very valuable stuff covered here Dave, the layout is simple to follow and a great insight to improving images, very much worth the subscription. All the best.
We're extremely pleased to announce that Libby, head honcho at Chromasia Training Limited, and the business brains behind our online tutorials, has just won the Business Start-up of the Year category of the Northwest Women in Business Awards 2009.