|
How to evaluate an image using the eyedropper tool
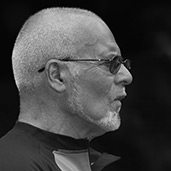
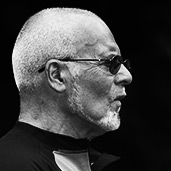
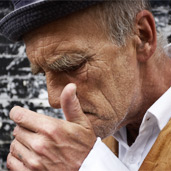
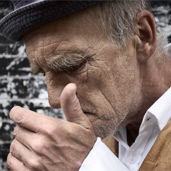
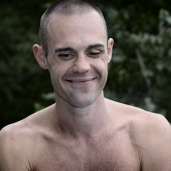
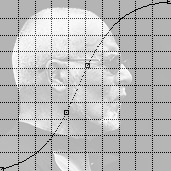
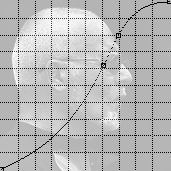
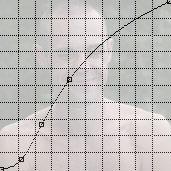
As we have previously noted, the steeper a curve the greater the increase in contrast, but when working with S-Curves not all of the Curve can be steep; i.e. both ends of the curve become progressively more shallow as they move towards either the white point or black point. So how do you decide which areas of an image should fall within the steep part of the Curve? Take a look at the following examples, and before you look at the Curves decide which of the three you prefer:
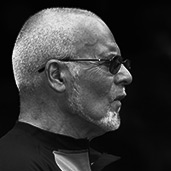
Hopefully, you thought the middle image was the best. The first image, with no Curve applied, is a bit flat, and the third, though retaining good detail in his hair, is too dark and doesn’t really emphasize his features. If you take a look at the Curves for the second and third images you’ll see that the steep section of the Curve, the line between the two control points of the S-Curve, is in different places: the first Curve increases the contrast in the mid-tones – the details in his face and around his eyes – while the second increases the contrast in the highlights, bringing out the detail in his close-cropped hair. While these Curves can be constructed through trial and error, and with experience you will be able to visually evaluate an image and have a rough idea of what your Curve should look like, there is an easier way of doing it, as illustrated by the following QuickTime movie (57s/812KB): If you can’t see the movie click here to view it in a new window. 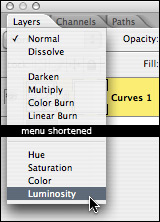
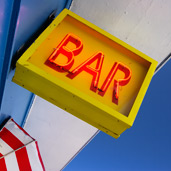
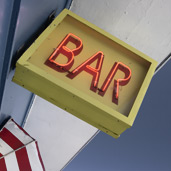
Luminosity blend mode and colour saturation
One thing you may have noticed, especially when applying quite strong S-Curves to an image, is that in addition to increasing the contrast, these also increase the colour saturation. More often than not, this will produce an attractive final result; i.e. the more deeply saturated colours will suit the parallel increase in contrast, but on other occasions you might want to increase the contrast without affecting the saturation. While you could desaturate the image after applying the Curve, using a Hue/Saturation adjustment layer or similar, there is a better, more efficient way. This involves changing the ‘blend mode’ of the Curves adjustment layer to ‘Luminosity’ rather than ‘Normal’. In the Layers palette, select the Curves adjustment layer you wish to alter then use the drop-down menu at the top of the palette to change the blend mode to Luminosity. The three examples that follow illustrate the difference that this change can make. In the first image, the Normal blend mode, in my opinion at least, produces a much better result. In the second, I think it’s probably more a question of preference: I prefer the version that uses the Normal blend mode, as I think that the more highly saturated colours better suit the subject matter, but you may prefer the more muted version that uses the Luminosity blend mode. In the third and final example, my personal preference is for the less saturated version, created by using the Luminosity blend mode, but again, you may disagree. In each of the examples I’ve included the original image which you can hover over to see the Curve that was applied to the image. The second shows the same image with the Curve applied set to ‘Normal’ blend mode, while the final one has its blend mode set to ‘Luminosity’.
David J. Nightingale © 2003–18 • all rights reserved
|
↓ David
↓ Libby
↓ Get the Latest News


software links
 Our annual subscribers and lifetime members can obtain a 15% discount on any of the Topaz Labs Photoshop plugins or plugin bundles.
 Our annual subscribers and lifetime members can obtain a 15% discount on Photomatix Pro.
training partners   Included above are links to a number of our training partners that we unreservedly recommend.
| |||||||||||||||||||||||||||||||||||||||||||||||||||||||||||||||||||||||||||||||||||||||||||||||||||||||||||||||||