 The Curves tool, like the Levels tool, allows us to make simple adjustments to the tonal range of an image, but unlike the Levels tool – where you only have control over the black point, white point, and mid-tones – the Curves tool provides a much higher level of control, not least because it allows you to manipulate both the white and black points and 15 additional anchor points that may be positioned anywhere within the original image’s tonal range.
Before explaining this in any more detail though, it’s worth spending a little bit of time familiarizing ourselves with the basics.
To use the Curves tool you need to either select it from the Image menu (Image → Adjustments → Curves) or create a Curves adjustment layer (Layer → New Adjustment Layer → Curves). As mentioned previously, the latter is a better method.
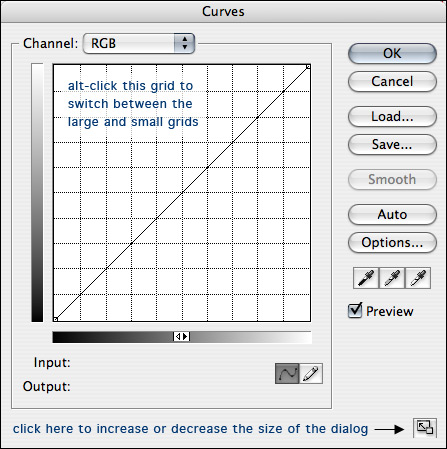
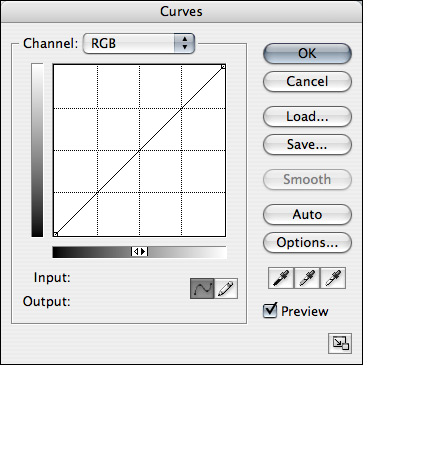
When you first use the Curves tool the dialog will look like the screen-grab to the right. There are two changes you can make though, both of which make it easier to work with, both of which are illustrated if you hover your mouse over the image.
The first change involves making the dialog bigger. This is useful because the changes you make to a Curve will often be quite subtle, so the bigger the dialog, the easier it is to make fine-scale adjustments. The second change, and this is probably more a question of preference, involves increasing the number of grid lines in the display. This is achieved by alt-clicking anywhere within the grid. For the remainder of this tutorial I’ll use screen-grabs of smaller dialog with the more detailed grid.
Setting white and black points
 On the previous page we discussed how to use the Levels tools to set the white and black points of an image to increase its tonal range. The same transformation can easily be applied using the Curves tool.
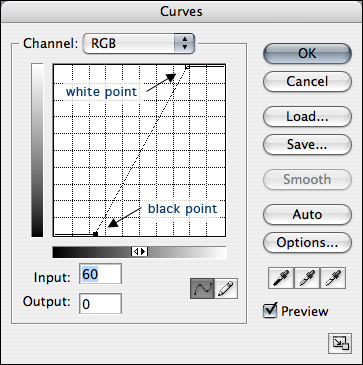
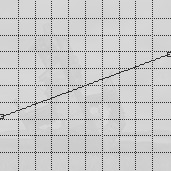
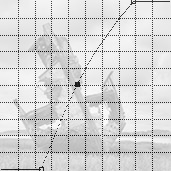
If you hover your mouse over the image to the right you will see that I have labeled the white and black points. This time, instead of using sliders (as with the Levels tool) the white and black points are adjusted by shifting the anchor points from their starting positions in the top-right and bottom-left of the dialog.
As with the Levels dialog, the Curves dialog also provides numerical feedback on the changes you make. In this example you can see that the black point anchor is selected (it’s a solid black box rather than an outline) and as with our previous Levels adjustment we have set the black point to 60. This remaps values at this level, or below, to 0; i.e. black.
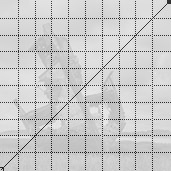
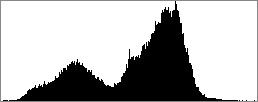
This produces a result that is identical to IMAGE 3 on the previous page: i.e. we now have an image that covers the full tonal range as can be seen from the following histogram:
What you will notice is that this adjusted Curve is steeper than the original. This stretches or expands the tones within an image, thereby increasing the contrast. Alternatively, if you decrease the slope, you compress the tonal range and decrease the contrast.
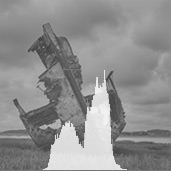
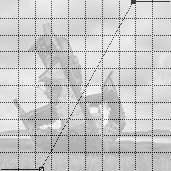
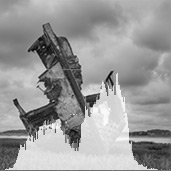
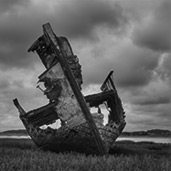
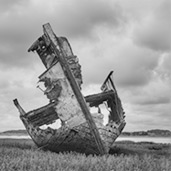
If you hover your mouse over the ‘show curve’ and ‘show histogram’ labels below the following three images you will be able to see the Curve that was applied to each image and the resultant histogram: no change with the first image, a decrease in tonal range/contrast with the second (by decreasing the slope of the Curve), and an increase in tonal range/contrast with the final image (by increasing the slope of the Curve).

original image
show curve • show histogram
|
|

compressed tonal range
show curve • show histogram
|
|
expanded tonal range
show curve • show histogram
|
Technical note • setting the white and black points with the eyedroppers
My preferred method of setting white and black points is to move the black point and white point control points as described above, keeping a careful eye on the histogram to monitor the changes. But there is another way. Underneath the ‘Options’ button in the Curves dialog are three eyedroppers. The first of these, the one on the left with a black tip, allows you to click within your image to set the black point. When you do so it remaps the RGB values beneath the cursor to 0. The third eyedropper sets the white point, and when you click within the image the RGB values beneath the eyedropper are remapped to 255. My advice, at least until you understand the ways in which the Curves tool can be used to adjust individual colour channels (a topic which is discussed on page five of this tutorial), is to set the black and white points manually.
The middle eyedropper, which will also be discussed later, is used to alter the colour balance of the image.
Altering the mid-tones
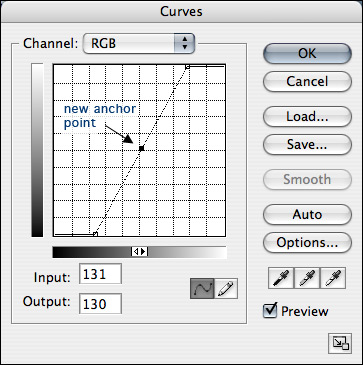
We can also use the Curves tool to alter the mid-tones of an image. With the Levels tool this was a simple matter of dragging the mid-tones slider (to the left to lighten an image, and to the right to darken it), but with the Curves tool it’s marginally more complicated insofar as we need to add an anchor point to control this area of the tonal range.
To add an anchor point at any position on a Curve you simply need to click the position on the Curve where you want to insert it. To control the mid-tones, this needs to be mid-way between the black point and white point, in this case almost exactly in the middle of the grid.
At this stage this has no effect, as it hasn’t altered the shape of the Curve in any way, but if I drag this point towards the top-left corner of the dialog it will increase the brightness of the mid-tones. Conversely, if I drag it down towards the bottom-right corner, it will decrease their brightness. The further you drag the anchor point, the greater the effect.
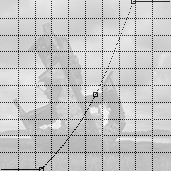
If you hover your mouse over any of the three images below you will see the Curve that was applied to each image. The first decreases the overall brightness of the mid-tones by a moderate amount (the input value for the new anchor point was 143 and the output value was 114). The second increases the overall brightness of the mid-tones. In this case the input value for the anchor point was 115 and the output value was 131. The final image uses a more extreme Curve, with an input value of 94 for the anchor point, and an output value of 117. If you need a reminder about the way in which Photoshop allocates numbers to different tonal values, please refer back to the painting by numbers technical note on the previous page.
mid-tones darkened
show curve
|
|
mid-tones lightened
show curve
|
|

mid-tones lightened more
show curve
|
Resetting the Curves dialog
 Often, when working with the Curves tool dialog, you may find that you have set numerous control points, on both the RGB Curve, as discussed on this page, or on the red, green and blue channel Curves, as discussed on the final page of this tutorial. Often, when working with the Curves tool dialog, you may find that you have set numerous control points, on both the RGB Curve, as discussed on this page, or on the red, green and blue channel Curves, as discussed on the final page of this tutorial.
If you decide that you’re not happy with the Curve you have constructed you can delete the control points, by selecting them and then deleting them with the delete key, or you can hit the Cancel button (which closes the dialog without making any changes).
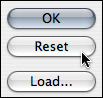
Alternatively, if you hold down the ‘Alt’ key you will notice that the Cancel button turns into a Reset button. If you click this button all your control points will be removed and you can start again: re-entering your control points, and adjusting your Curve.
In this section we have discussed some of the basic ways in which the Curves tool can be used, including setting white and black points and altering the mid-tone areas of an image. In the next section we will move on to consider S-Curves and how to construct them to effectively enhance your images.
|
David J. Nightingale © 2003–18 • all rights reserved

<<< previous page • next page >>>
|

|